
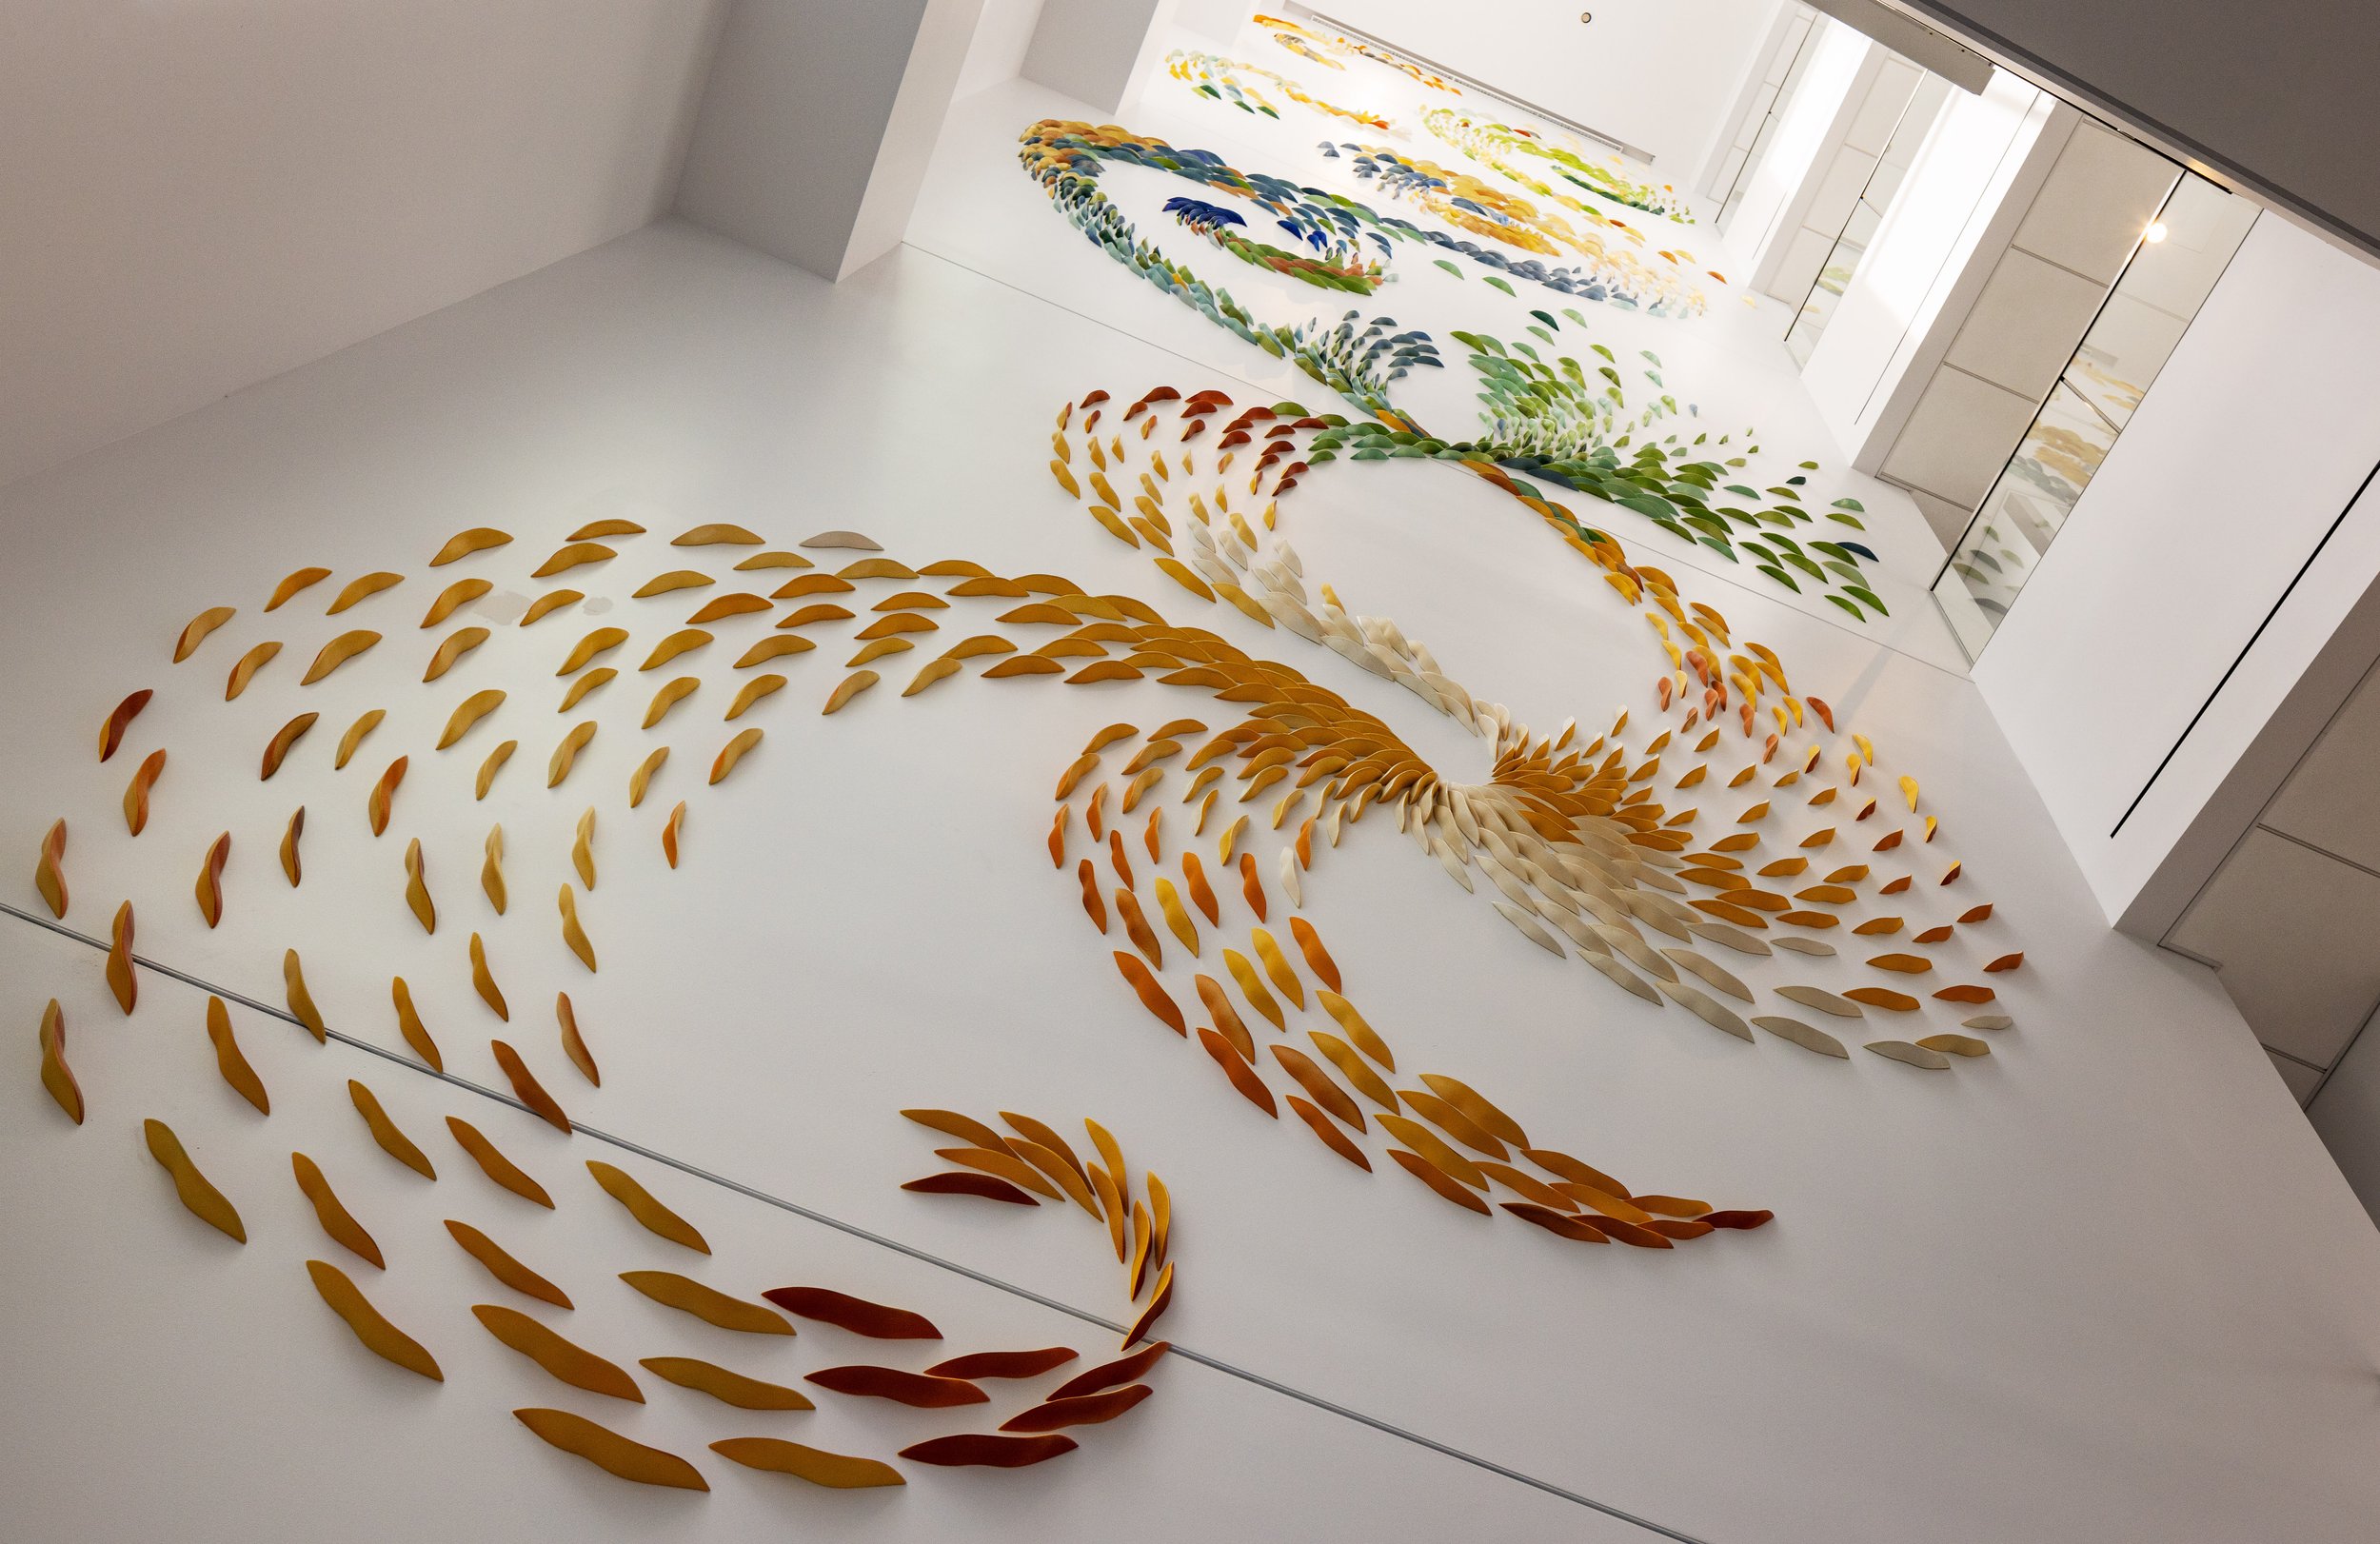
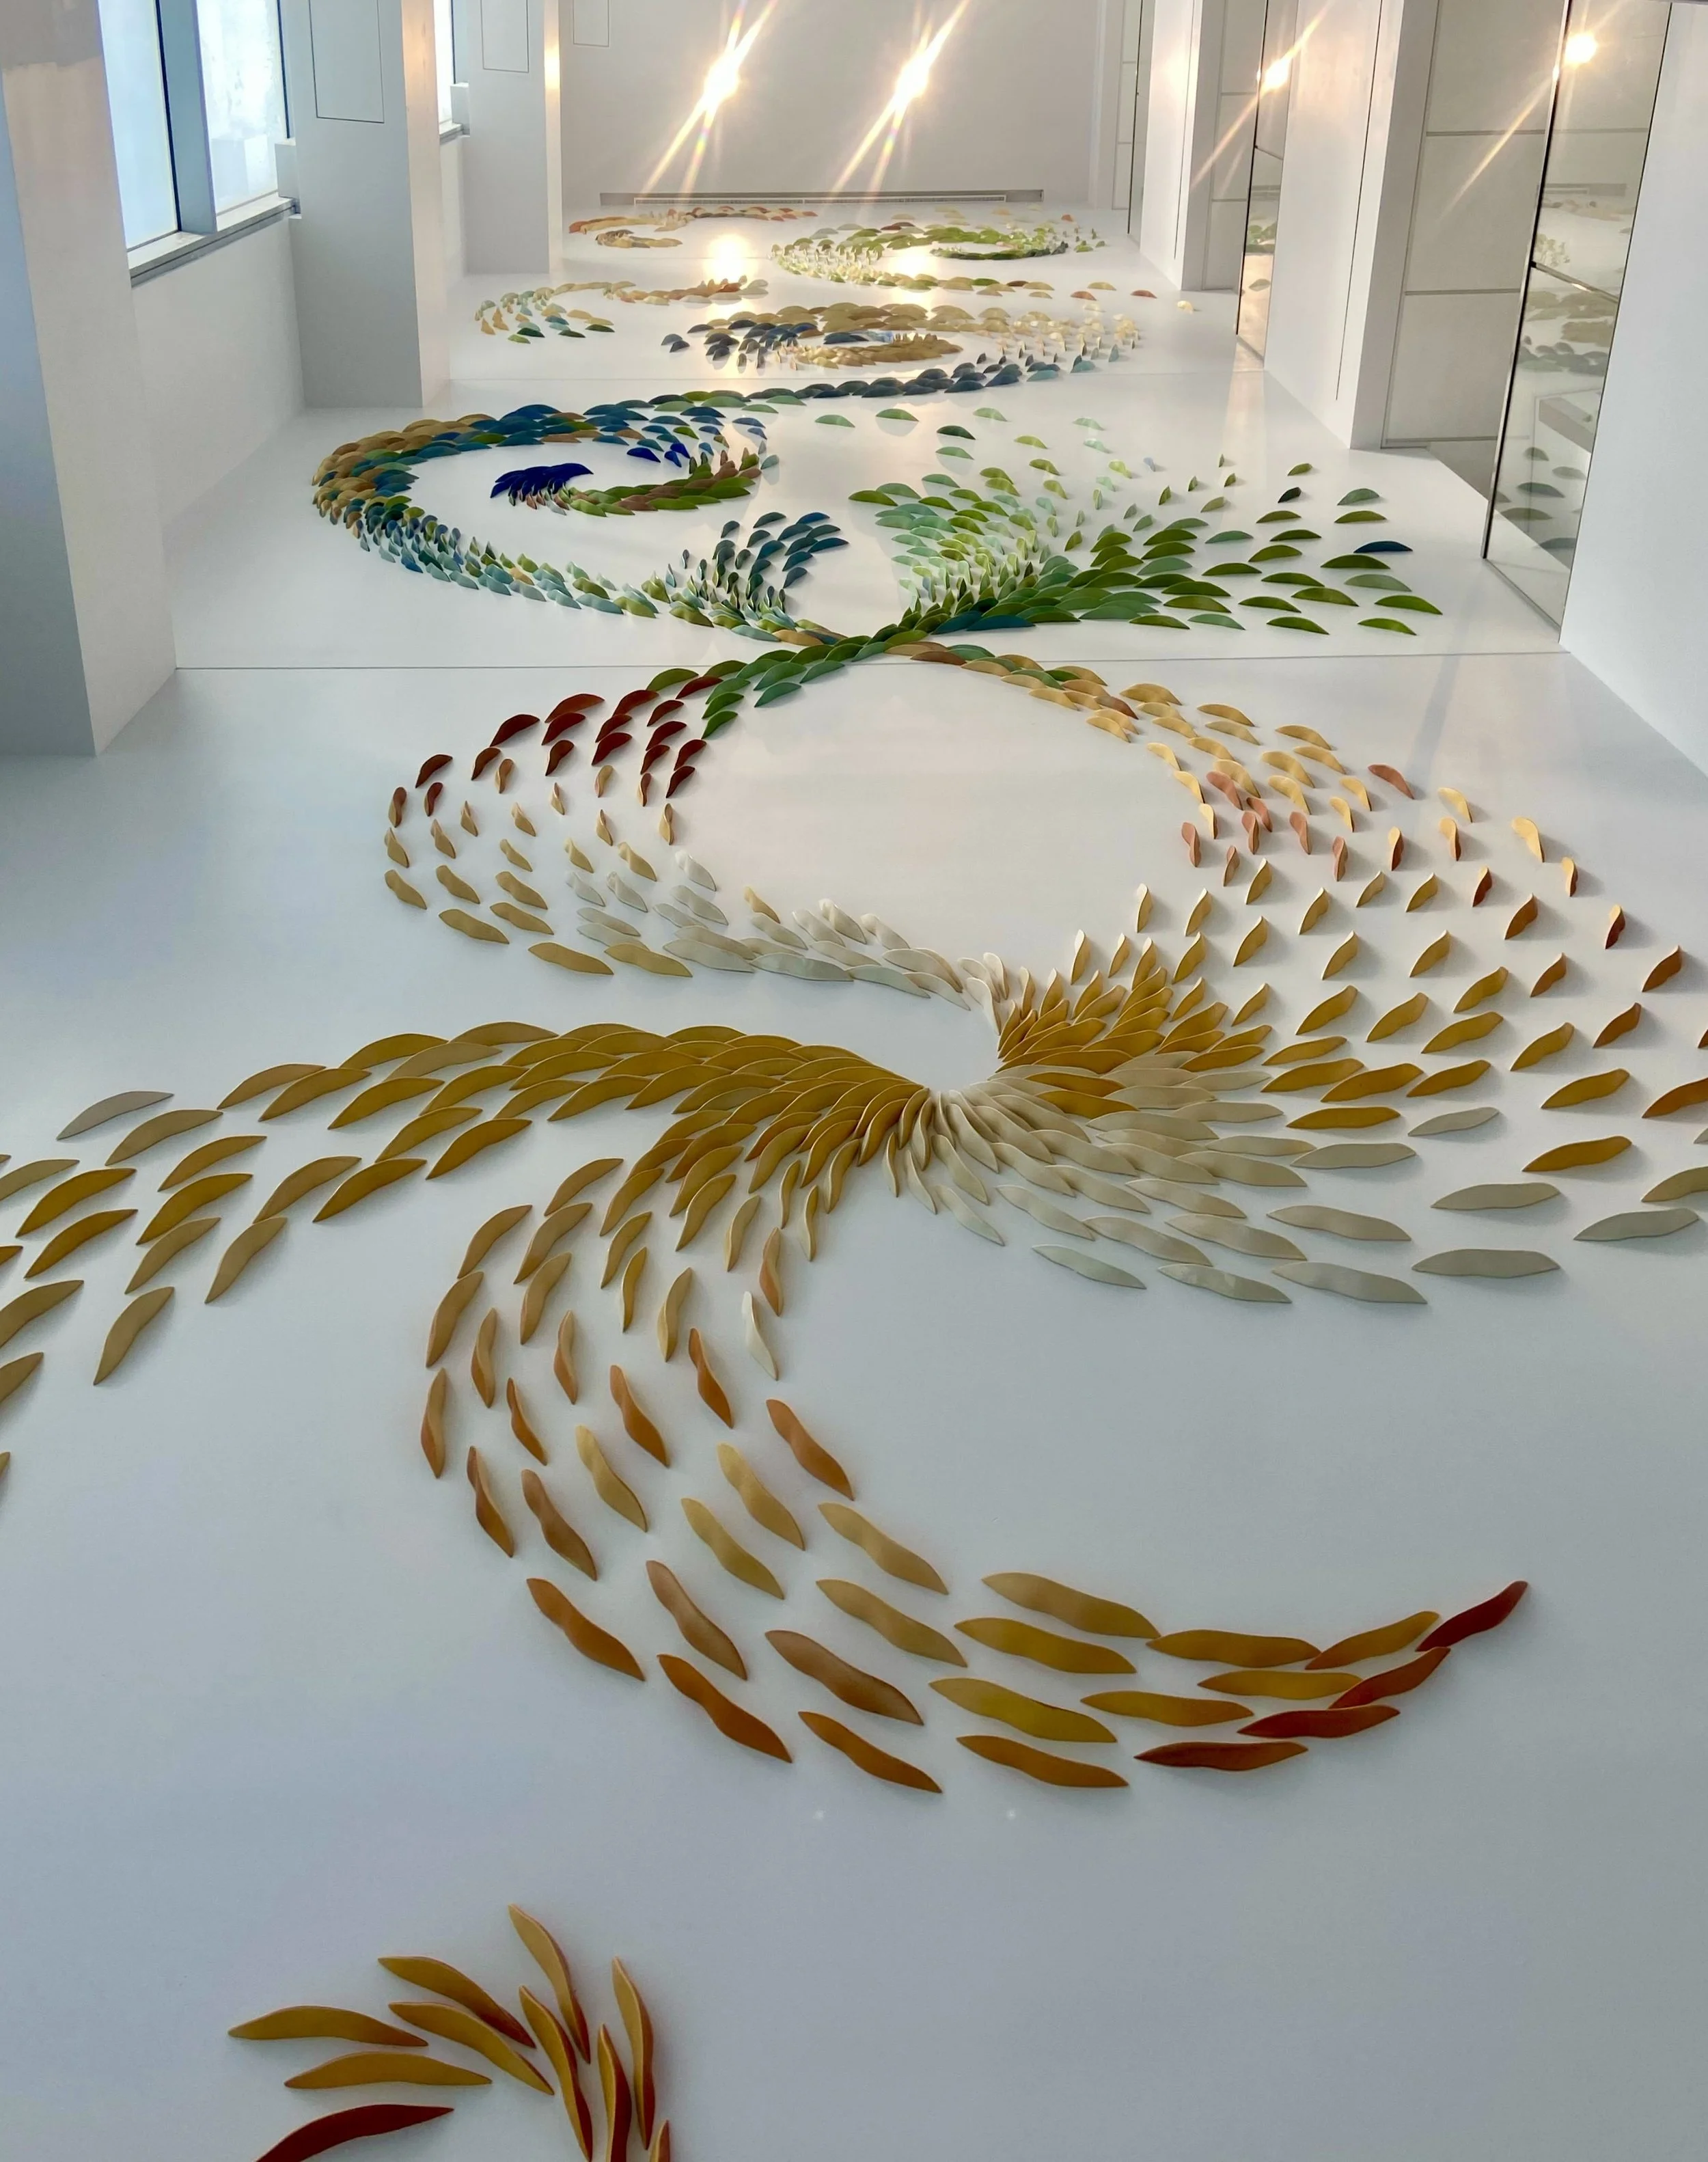
Dartmouth Health Stairwell: Pods

In our largest Pod installation to date, this evocative design reaches 70’ in sweeping dynamic curves. Natalie designed the piece for the four story stairwell in the new Patient Pavilion on the Dartmouth Health campus to bring a calming sense of flow to this busy healthcare environment.
Following themes of expansion and contraction, stillness and rushing energy, Natalie hopes to bring the healing power of art to the space with an invitation to pause and breathe. As patients and staff walk up and down the stairs throughout the day, they flow up like air and wind curling up, and down like water falling.
These photos show the design process in individual elements on a large floor, and some essential digital aids when designing and installing a piece of this scale.
Thank you to Joni Taube of Art 3 Gallery for facilitating this project and to Dartmouth Health for celebrating the importance of artwork in healing spaces.


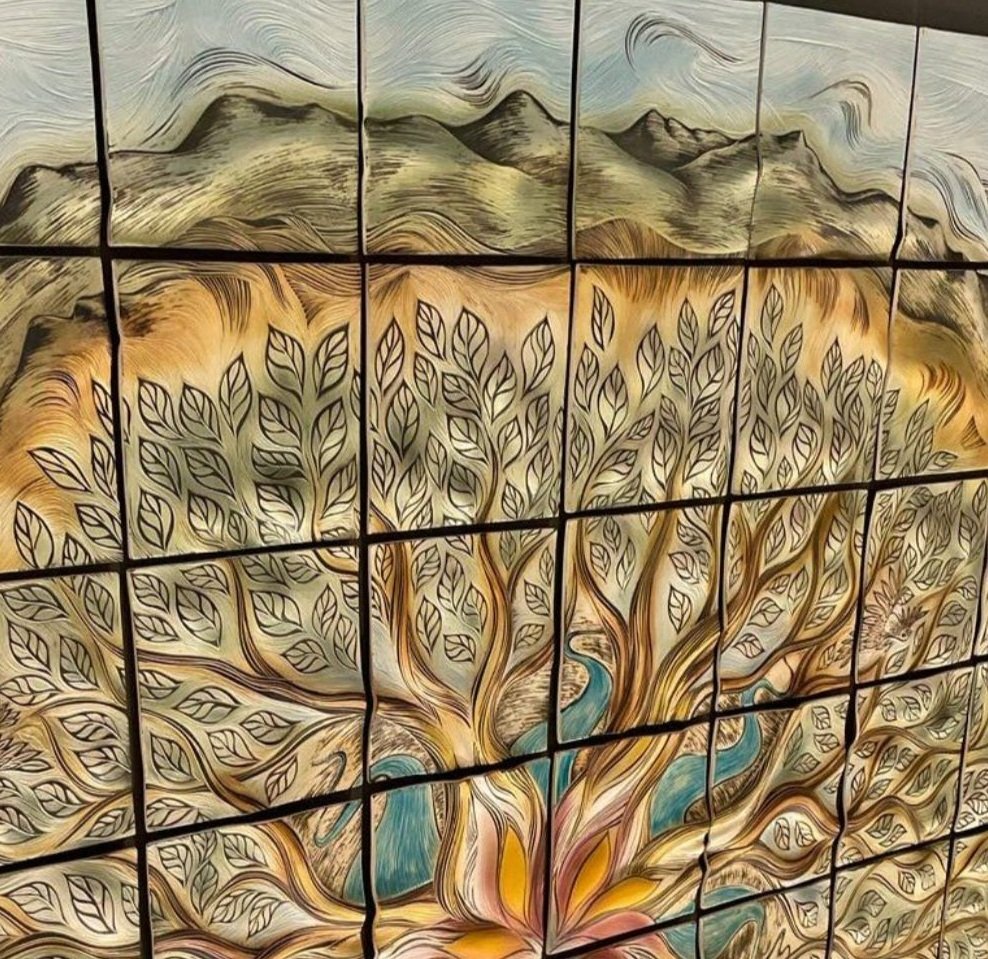
Baystate Medical Lobby Tree of LIfe
An image of integrated healing for the Baystate Medical entrance
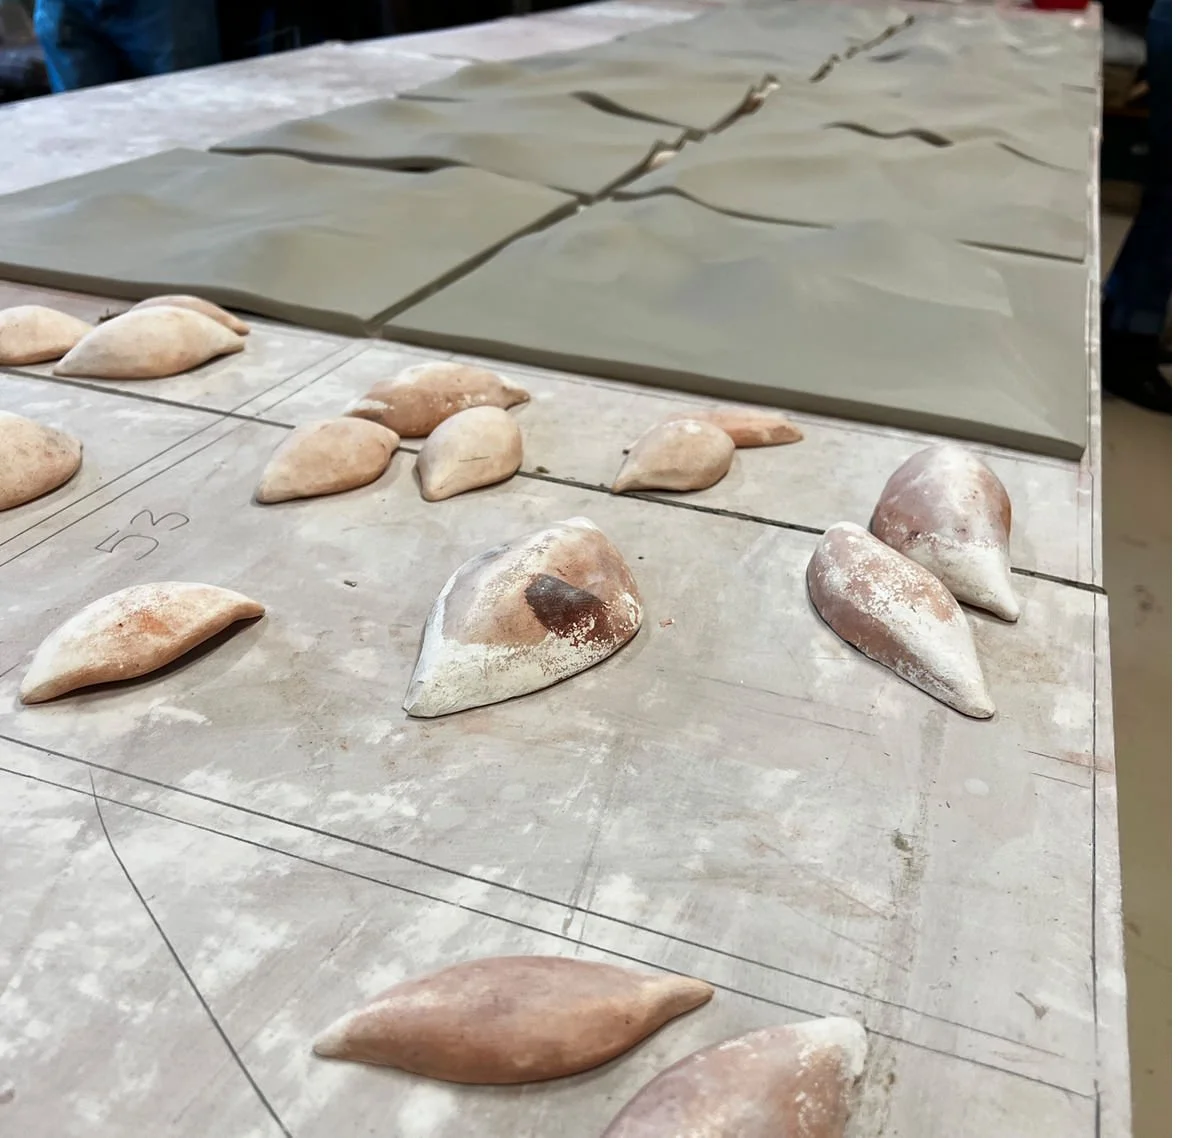
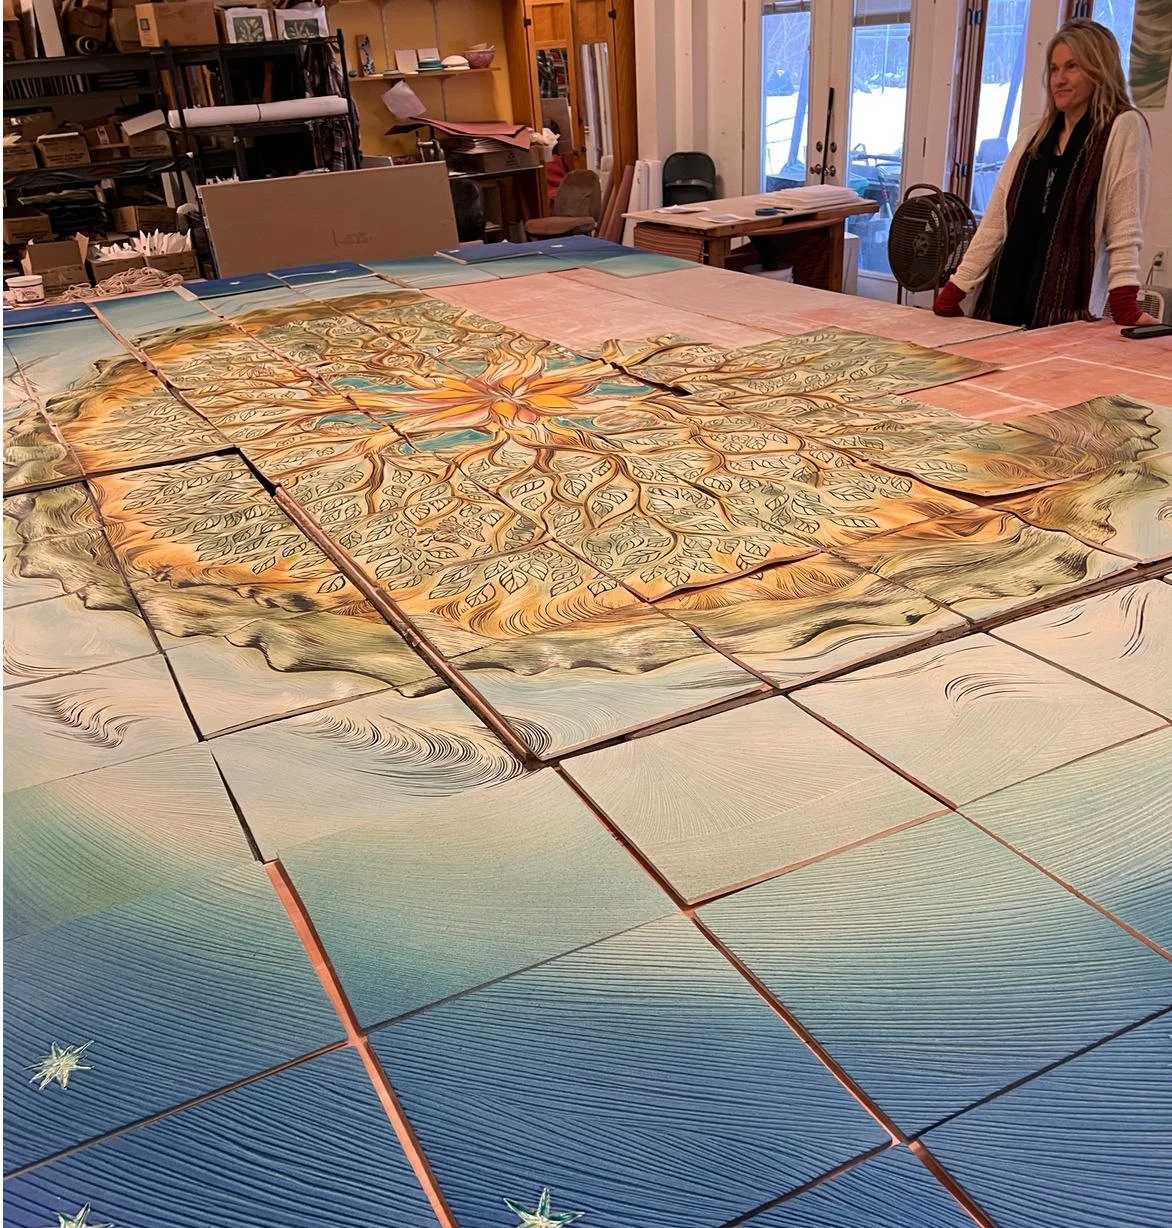
In mid-December of 2022, we received exciting news - our design was approved and we had 10 weeks to create one of the largest and most ambitious sculptural, hand-carved murals to date. These photos show the initial designs and early stages of the process as the team worked through the holidays to pug, roll, shape, and carve the 128 14" clay tiles. 128!
The kiln gods smiled and Natalie and Cynthia used their abundance of creativity to move through this massive project with skill. On installation day, the final tiles loaded into the van were still warm from the kiln and the install went off without a hitch. Not only did Natalie design and create the artwork, she also installed it, a full 24 hours before the final deadline.
“This piece was inspired by a long-time desire to illustrate how the earth has a system of energy and vitality similar to the human body. When I learned the building design concept was based on ‘A Healing Rhythm’ theme - and each of the seven building floors represented a layer of the earth’s biosphere - I related it to the eastern tradition of energy centers in the body called the seven major Chakras. Here was an opportunity to artistically render how these different layers of the earth are synonymous with those of our bodies.” (From the Natalie Blake artist statement.)
Our studio worked with Carla Santia & Associates on this design for the Baystate Health campus in Springfield, MA where a seven-floor “Healing Rhythm” concept was beautifully executed. Moving through the layers of stone, soil, rivers, sub-canopy, canopy, mountains, and atmosphere, the artistic elements of each floor of the building were designed with inspired vision and care. Thank you to Carla Santia and the Baystate team for celebrating the healing power of art!


The Golden Eagle Installation
The final phases of production and installation for the Golden Eagle
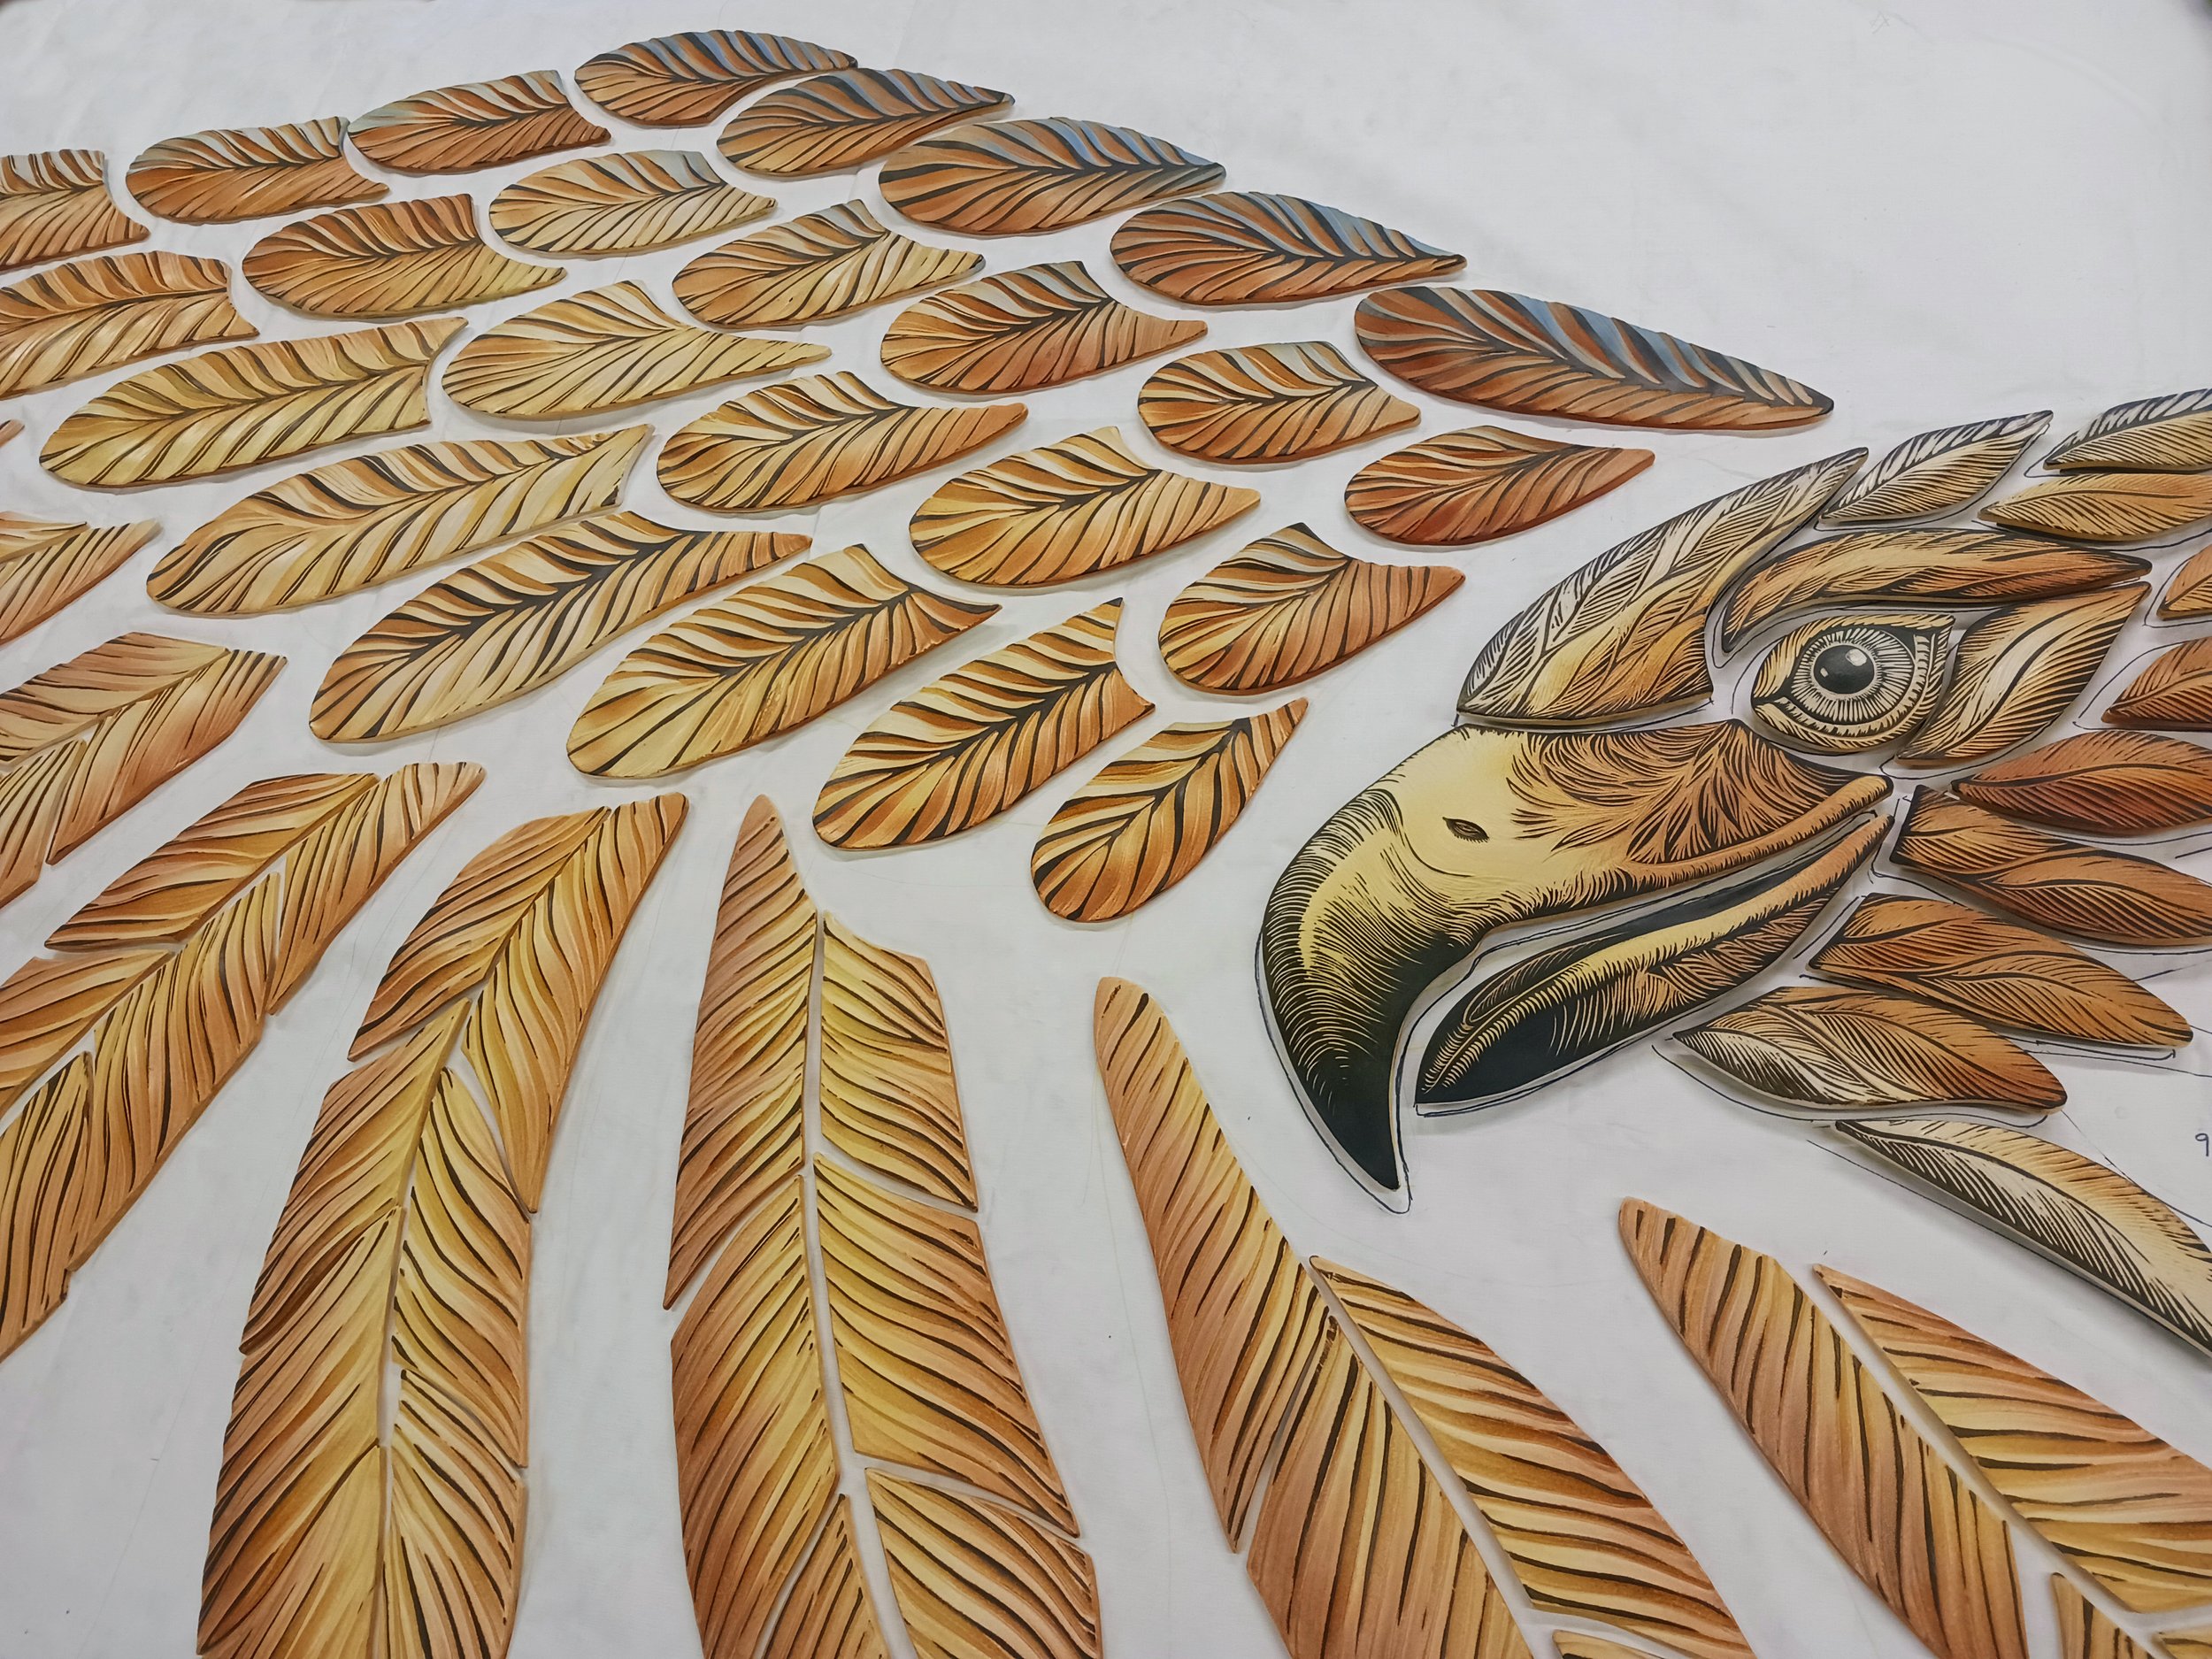
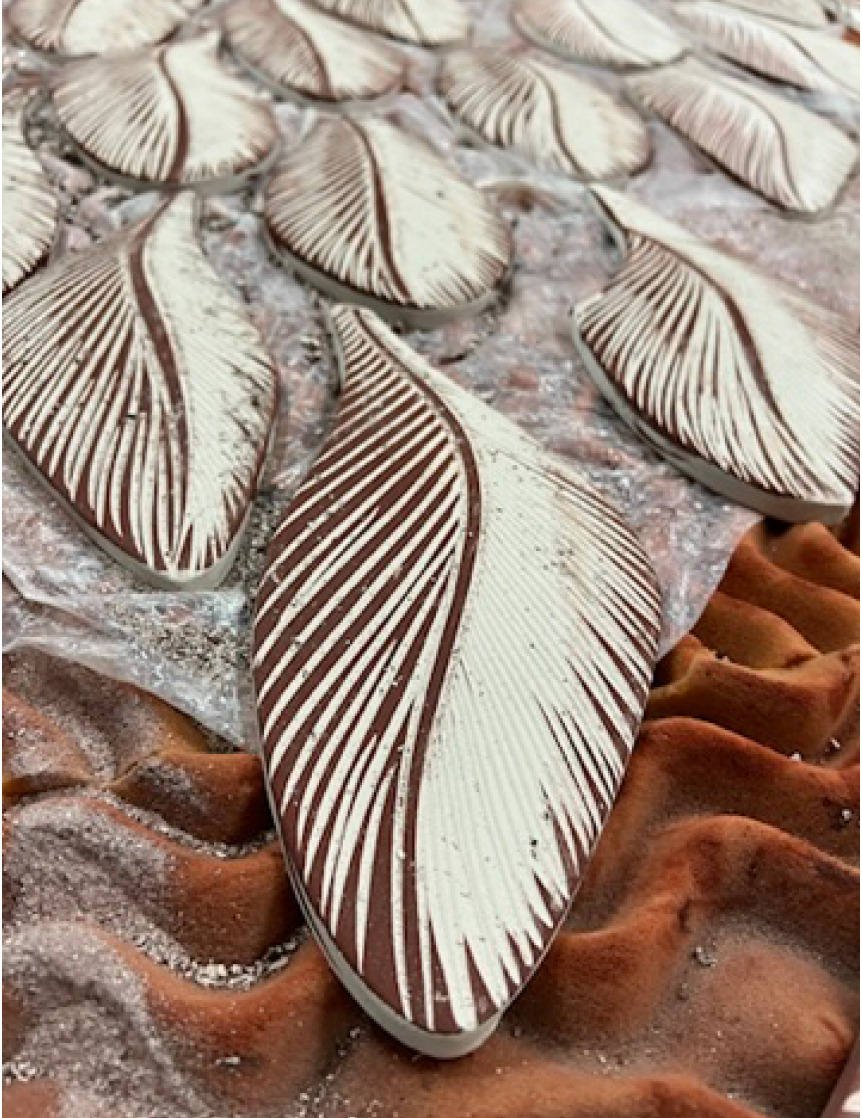
PART 2: The Golden Eagle for El Paso Final Production and Installation
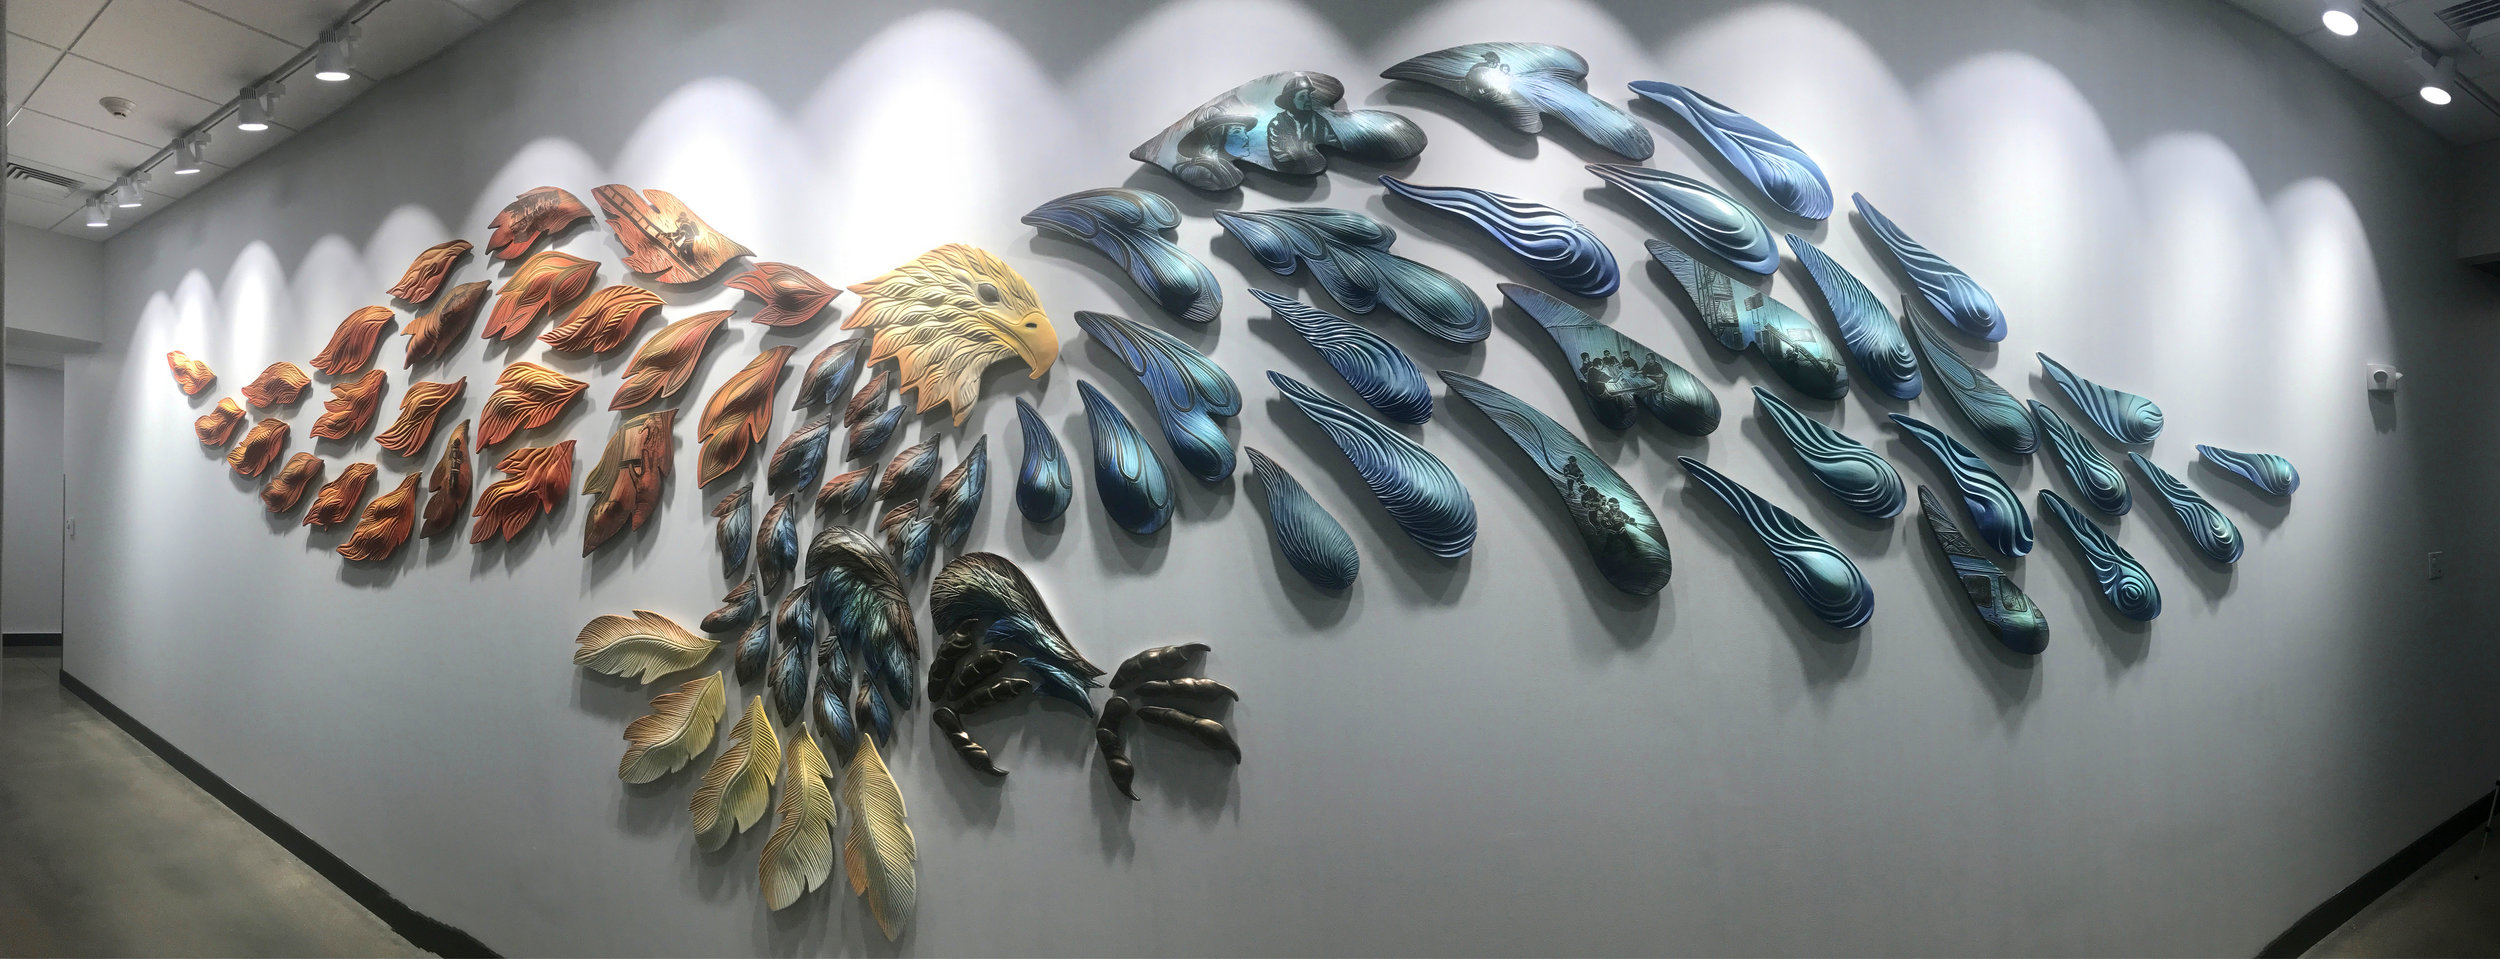
The second phase of production for this 40’ long Golden Eagle included glazing for subtle hues of gold, blue, and orange, laying out the installation template, affixing the backing system for secure hanging, packing for safe transport, and finally the installation on site.
Due to delays in the construction of the building, we had the Eagle in process in our studio for over two years — it’s been an inspiring project on a scale that is a perfect fit for the power-house team of Natalie Blake and Cynthia Parker-Houghton. A large project with this complexity and nuance, which involved several rounds of community feedback and dialogue, is a natural and utterly enjoyable artistic experience for this team of studio artists and assistants.
Thank you to the team at the Museums and Cultural Affairs Department in El Paso who helped guide the process every step of the way, including a super smooth installation. We are filled with gratitude for this opportunity.


The Golden Eagle for El Paso
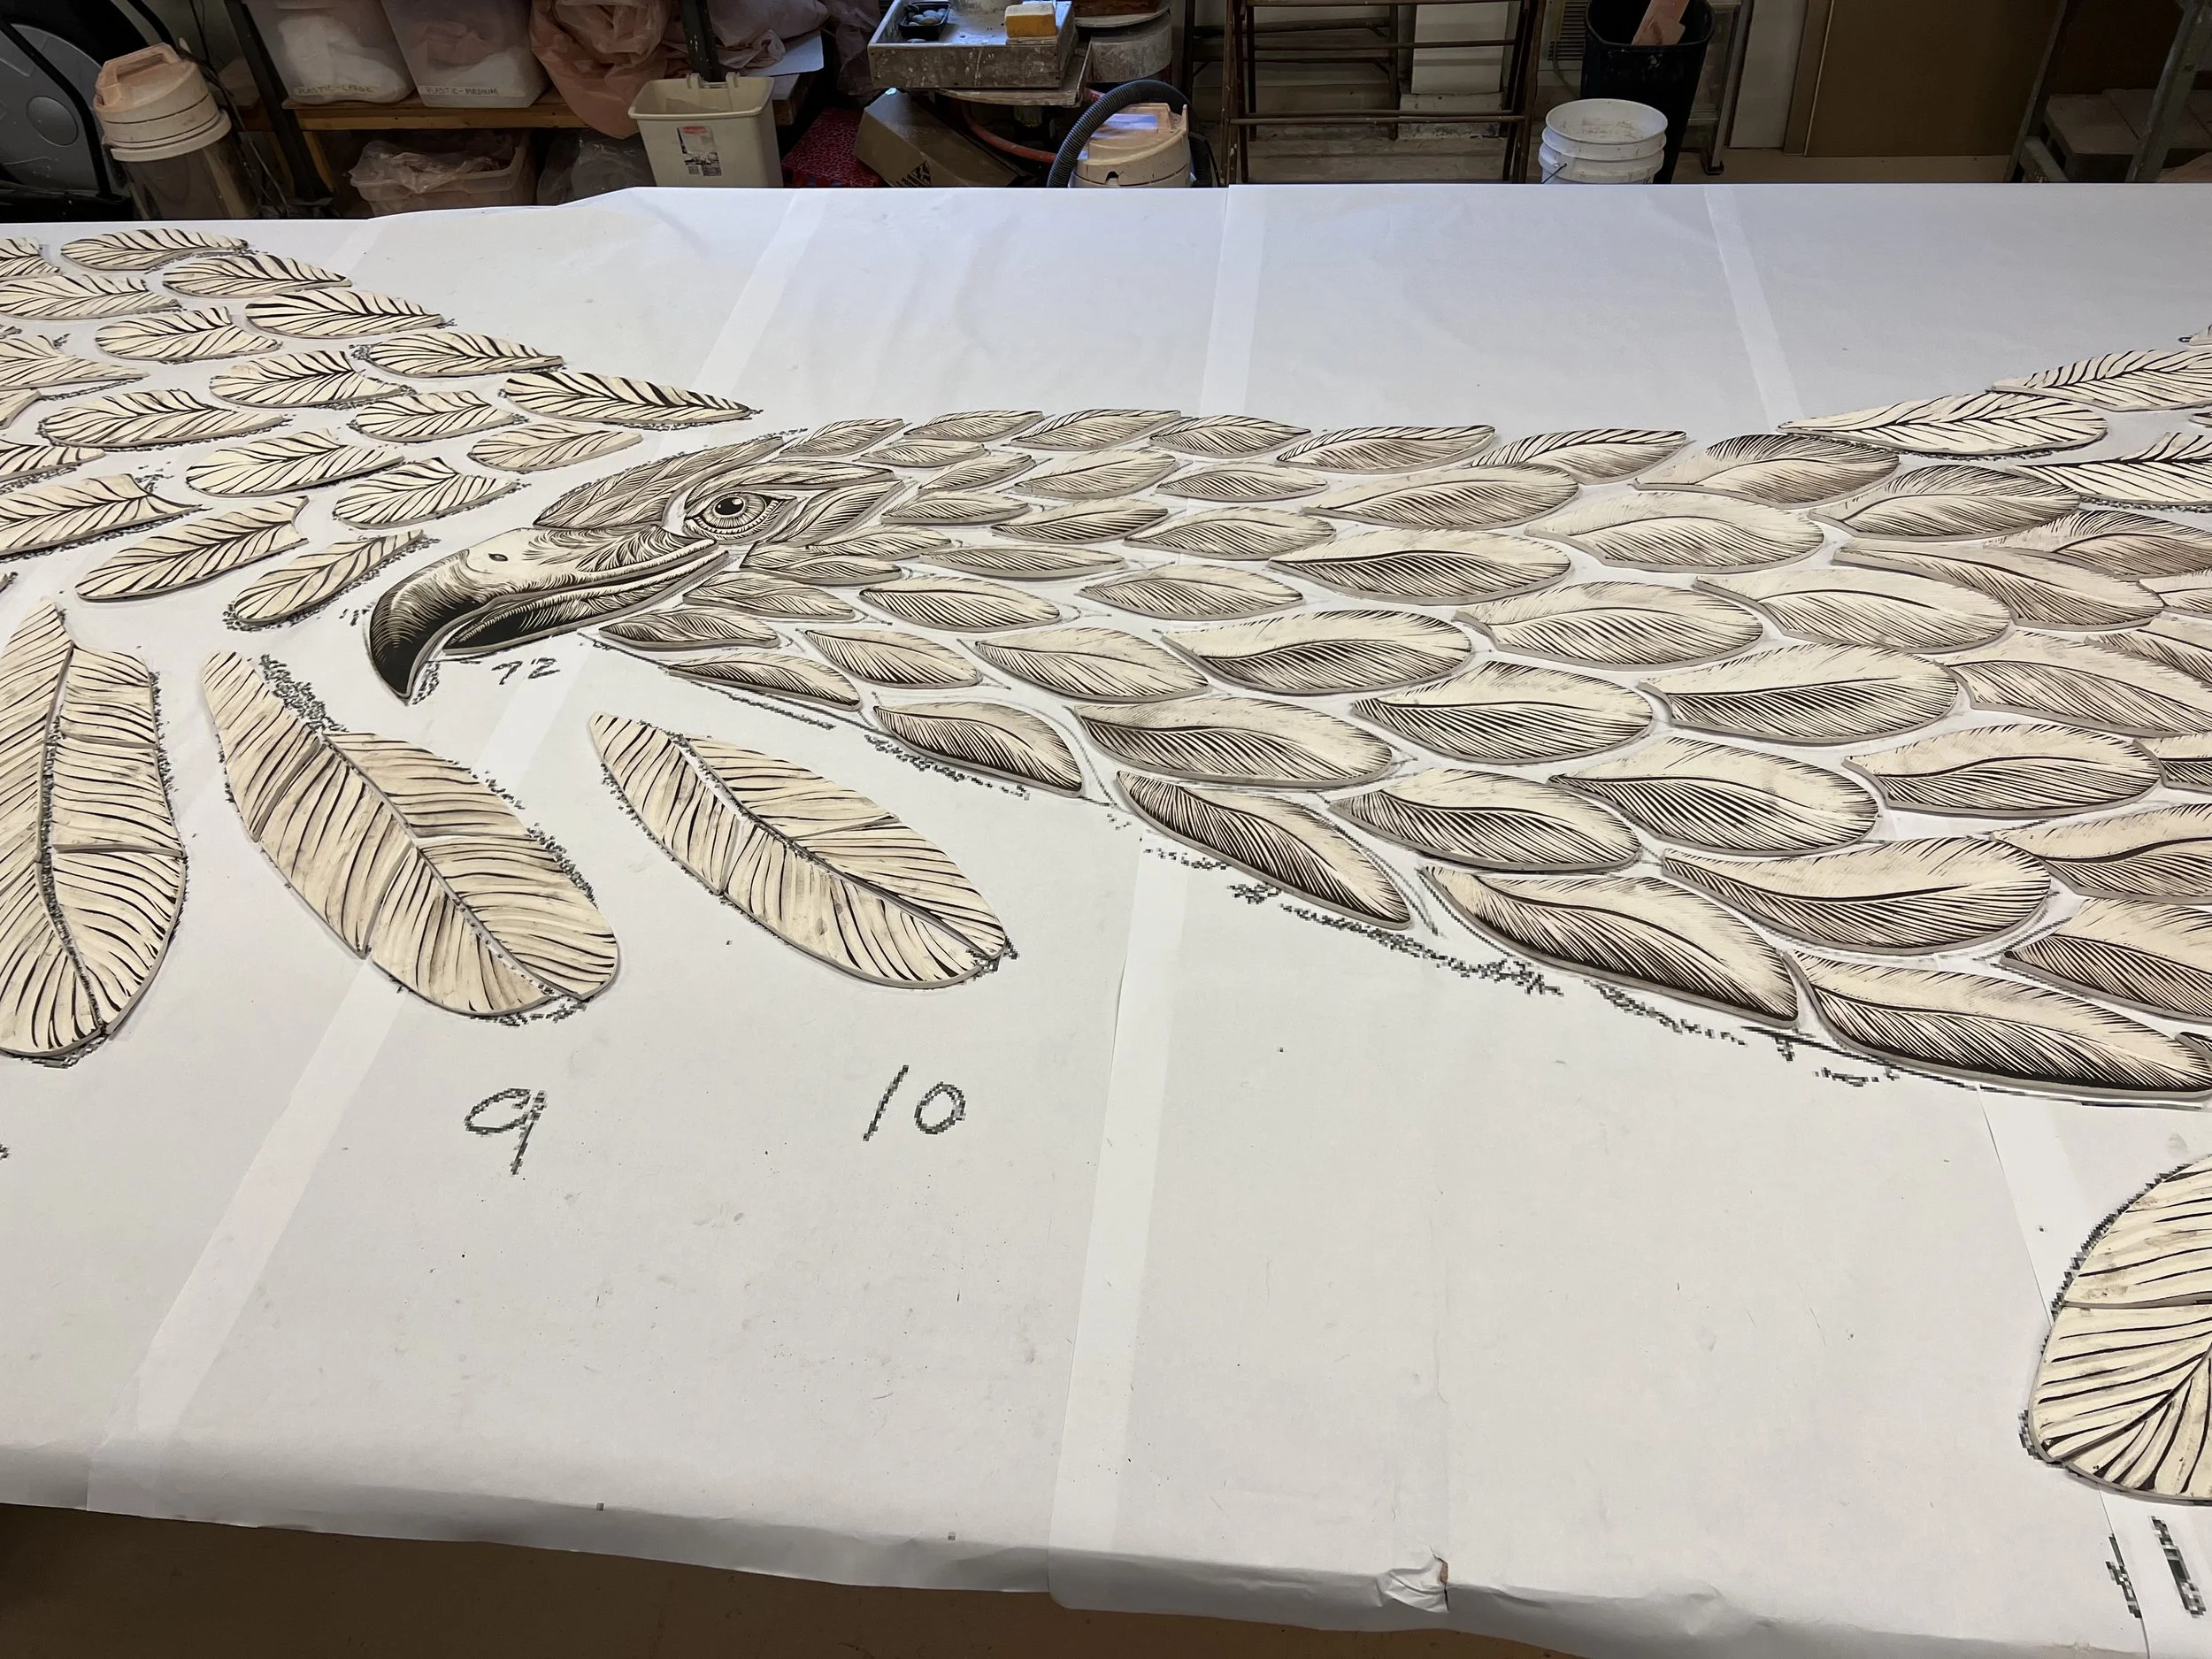
A Golden Eagle with a 40’ wingspan for El Paso, initial proposal and the first phase of production
Part 1: The Concept and First Phase of Production
In 2022, our Golden Sun Eagle design was selected for the public art grant for the El Paso Police Department Eastside Regional Command Center lobby, a $125,000 award.
The eagle is a symbol of so many things - strength, spirit, protection, and pride. Natalie and Cynthia were also inspired by the eagle as an image of healing. The large 40’ wings stretch out to gently hold the space and the noble eye holds a steady gaze. Many people will pass though this lobby, from those who work there daily to those passing through during difficult moments, and we created this design to provide a sense of strength, peace, and comfort.
Surrounding the eagle are stars symbolizing those who have passed in the line of duty, providing a place for reflection while honoring the profound sacrifice. It has been a privilege to translate this image through our medium of earth and fire here in our studio and we are thrilled that it has now taken flight!
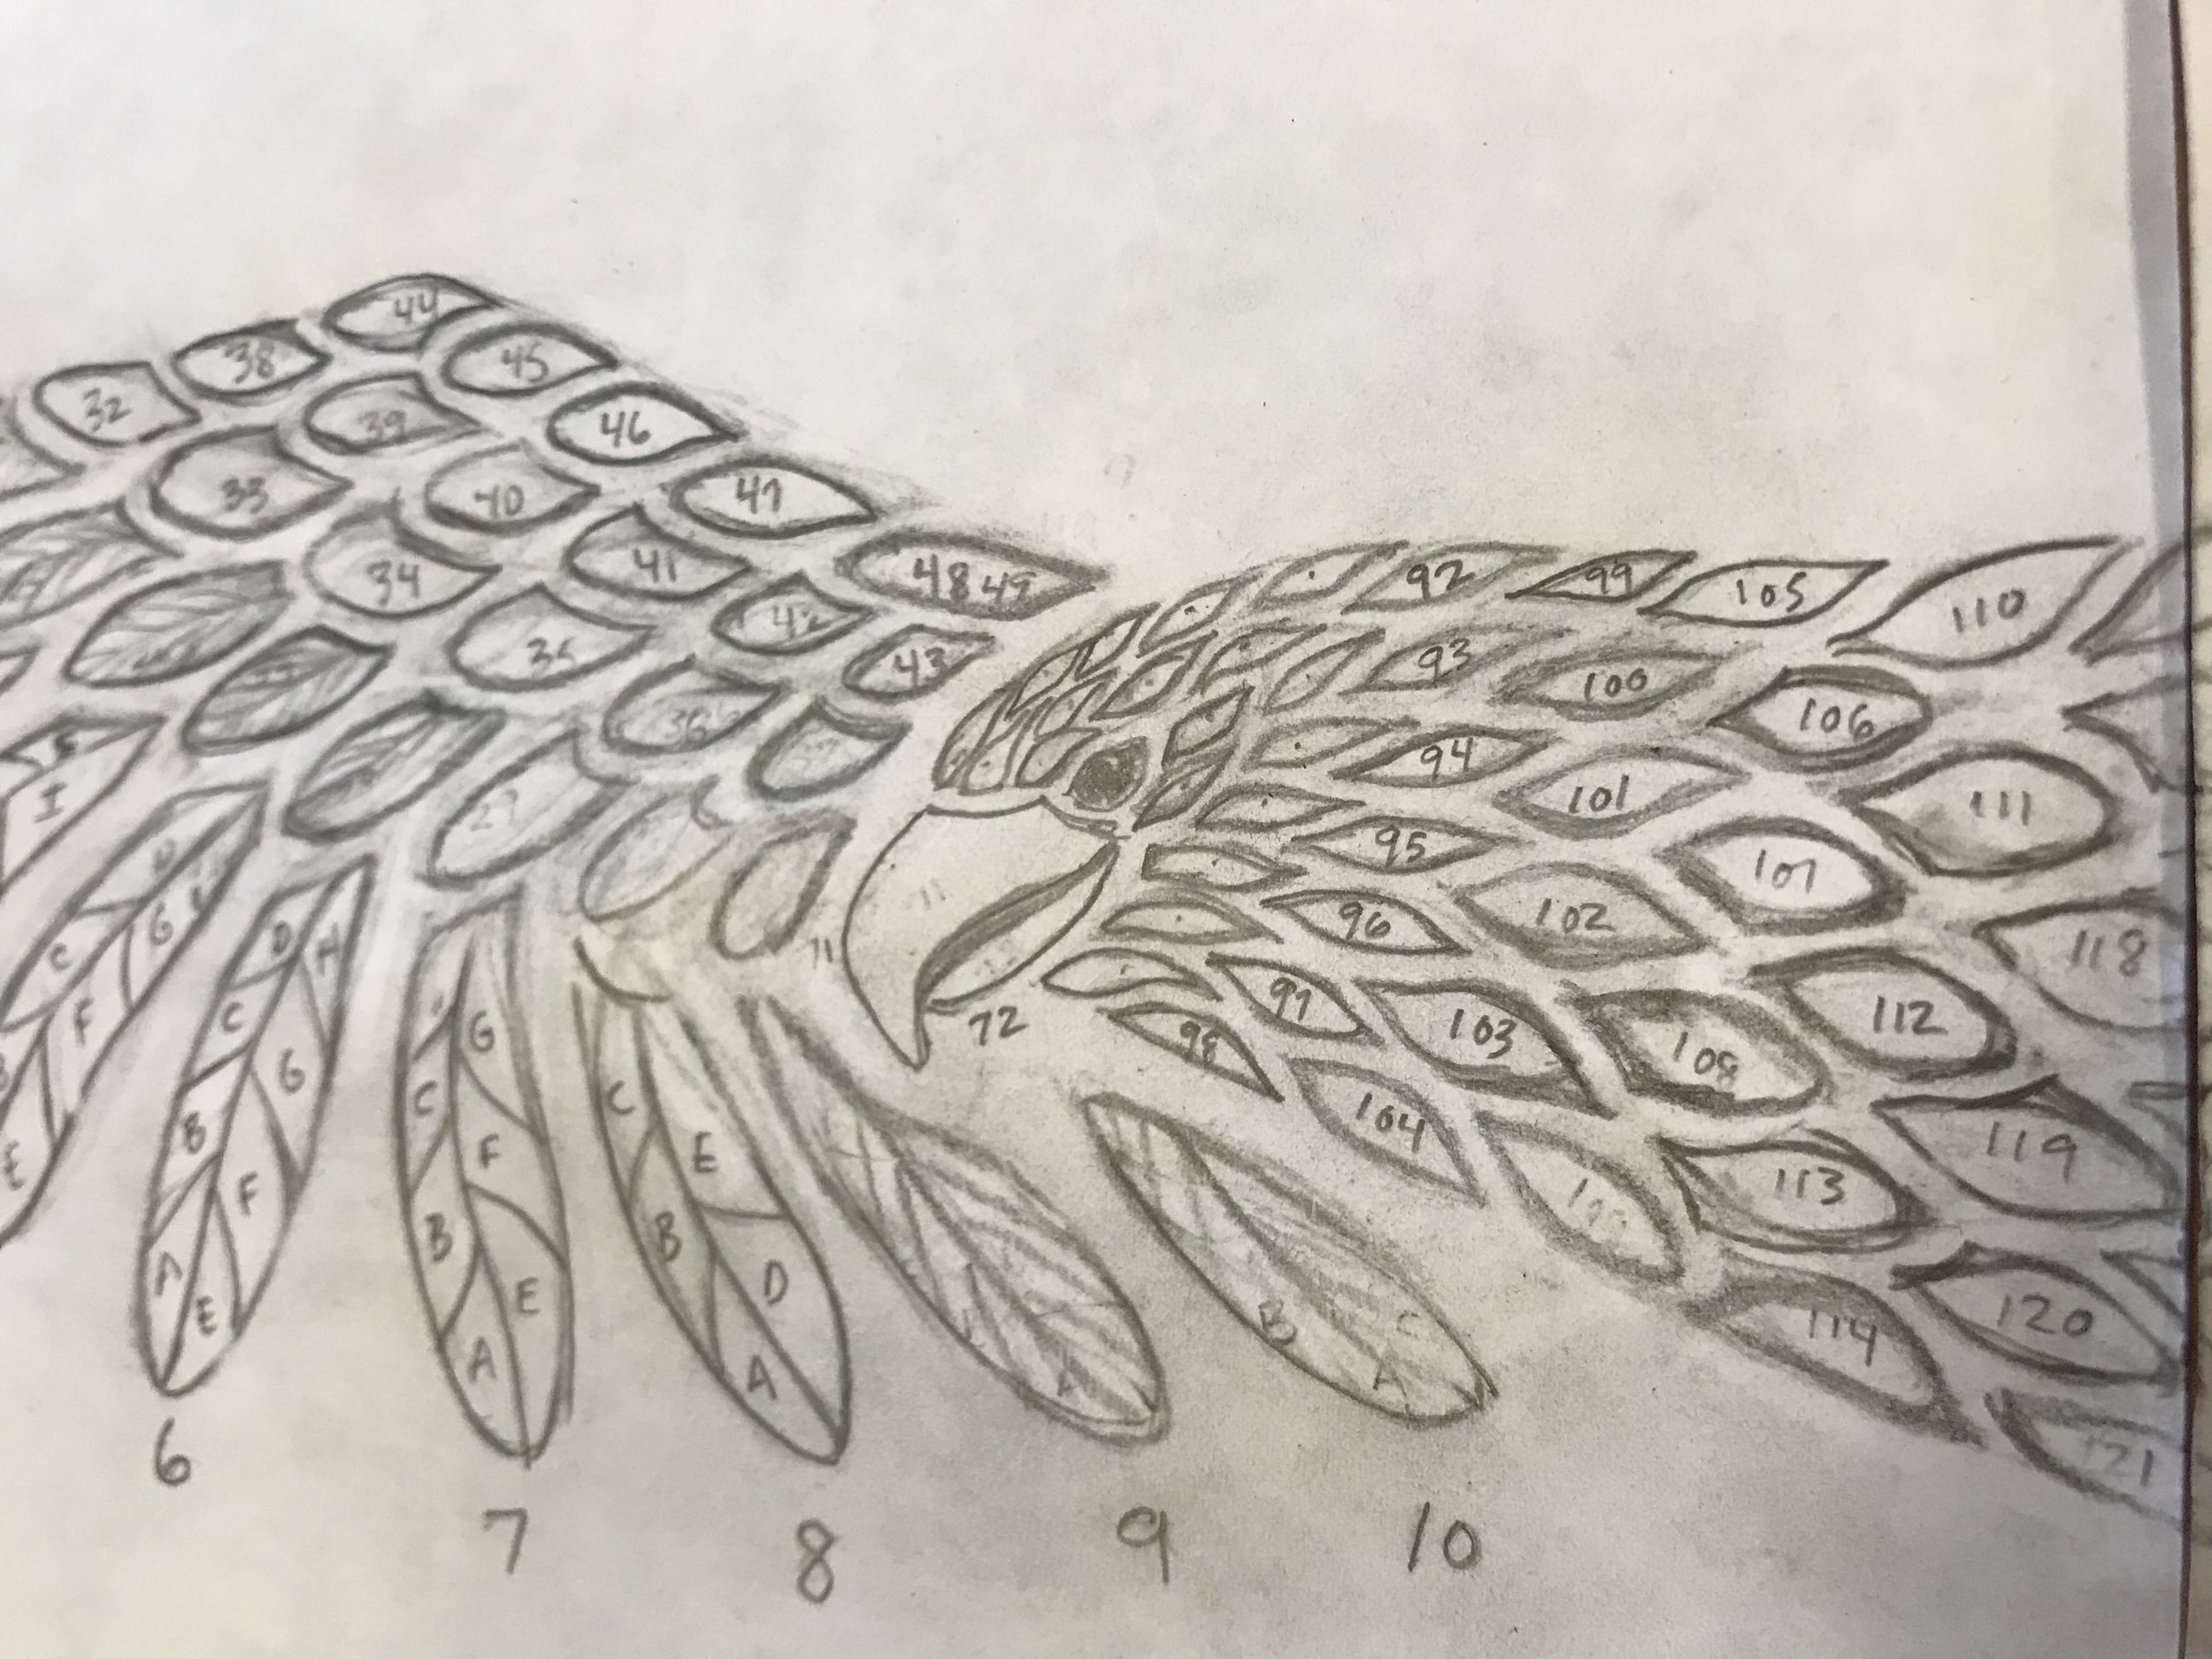
Below are the images from our original proposal, which was adjusted with community feedback and rounds of revision, and several steps of the initial production process. Mid-way through production, we hosted the staff of the El Paso Cultural and Museum department for an in-person review and approval.
In spring of 2024, Cynthia flew out to El Paso to assist with the installation. See here for more photos of the final stages of production and installation.


The Fire/Water Eagle for Rhode Island
An Eagle with narrative elements tucked into the fire and water wings.
The installed 30’ eagle
Our installation for the Rhode Island Fire Academy in Exeter, RI is complete and the Eagle has taken flight. For the public art grant application, Natalie and Cynthia sketched the concept of a 30-foot wide eagle with one wing composed of “fire feathers” and the other of “water feathers.” The power of the wind lifts the eagle's wings, and the talons are glazed with bronze to represent their contact with the earth -- the four elements of earth, air, fire, and water play a huge role in the firefighter's skilled approach to controlling a blaze, and all four elements are honored in the composition of this eagle.
Images from the firefighting community, showing moments of connection, inspiration, and bravery, are interspersed through the feathers, telling a story from wing to wing.
The sketch was transformed into clay shape tiles and carved piece by piece. Once each tile was completed, it went through several rounds of glazing before being backed and installed in the new Academy building as one magnificent creature.
These images give a glimpse into the production process. From beginning to end, with several rest periods in between, the project lasted over ten months.
We are thrilled to be a part of the artistic team celebrating and honoring the work of fire and rescue communities everywhere. Thank you to the Rhode Island State Council On the Arts for this incredible opportunity!
The original sketch


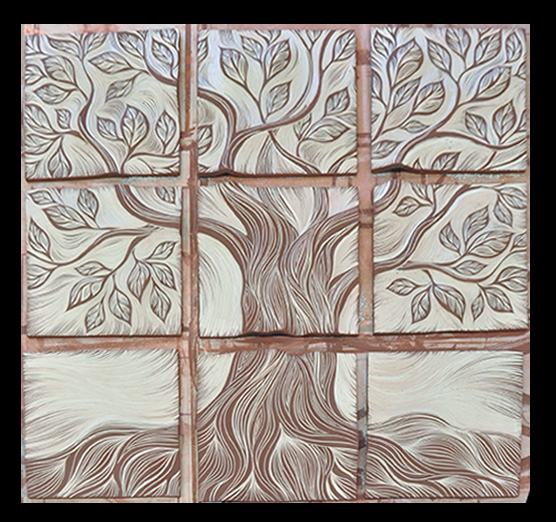
Making a Tree of Life Mural
Once again our popular, handmade, carved, ceramic Tree of Life wall tile art will adorn a public space: this time a church in Florida. The piece, measuring 36" x 36", will be hung in the lounge at the church.
Cynthia Parker-Houghton, studio designer, created this piece. We thought it would be fun to document the process of making this piece.

handmade, carved, ceramic wall art tile by Natalie Blake
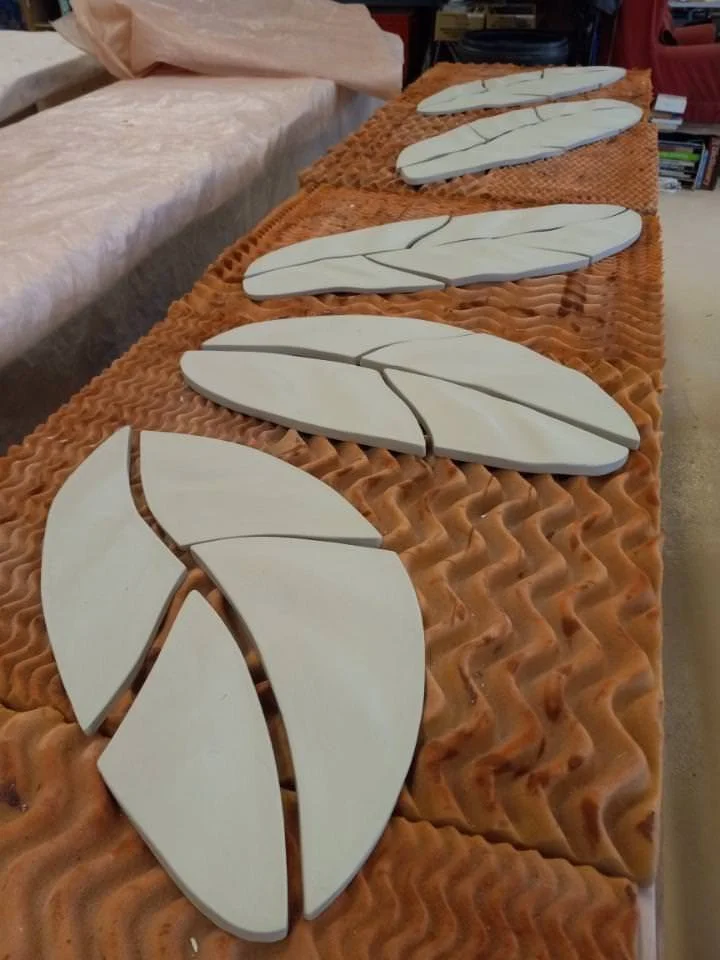
The first step in the process is laying out the handmade forms over which the clay tiles will drape, thus creating undulations in the tiles. Here's what Cynthia says about this step:
"The reason I stay interested in this tree icon is because it is familiar, comforting, grounding. And I think these qualities are especially important when the piece will be displayed in a sacred space. When I lay out the forms, I always start with the trunk--the forms flow out from there and down into the roots. I get the feeling that these forms represent the flow of energy from the nutrients in the soil to the roots, up the trunk and out the leaves. Because of our carving style--we carve away the black slip to reveal the white clay underneath, the piece has an energetic look to it. You can imagine the wind and the particles flowing around it. "

DSC_0001

forms laid out

tiles on forms
After the clay is laid over the forms we paint on the slip:

handmade ceramic tiles

DSC_0002 2
After the slip dries we begin carving, using a special tool that removes the darker slip.

handmade, sgraffito-carved, ceramic wall tile by Natalie Blake

Cynthia Carving tree
handsculpted, ceramic tile by Natalie Blake
Here's what Cynthia has to say about carving:
"I get inspiration from nature. As I'm carving I'm not thinking of a specific species of tree but the "feeling" of the tree-- the sturdiness or the delicateness or other qualities that the tree embodies. I can feel those as I'm carving. There's always a little personification too: like this is the body of the tree, these are the arms.
My carving style is a kind of dance. I use my whole body when I carve. If I just use my hand I don't have the grace. So I use my shoulder, my whole arm, my trunk,--there's a flow to it. The lines I choose to make are based on that flow. Sometimes it's appropriate to make small, tight lines, but generally I use more fluid, flowing lines."
The final steps are bisque-firing and glaze-firing, which takes about a week. We then glue on our custom backings for easy hanging. Start to finish, the process takes about 4-5 weeks.
When I Am Among the Trees
When I am among the trees, especially the willows and the honey locust, equally the beech, the oaks and the pines, they give off such hints of gladness. I would almost say that they save me, and daily.
I am so distant from the hope of myself, in which I have goodness, and discernment, and never hurry through the world but walk slowly, and bow often.
Around me the trees stir in their leaves and call out, "Stay awhile." The light flows from their branches.
And they call again, "It's simple," they say, "and you too have come into the world to do this, to go easy, to be filled with light, and to shine."
-Mary Oliver
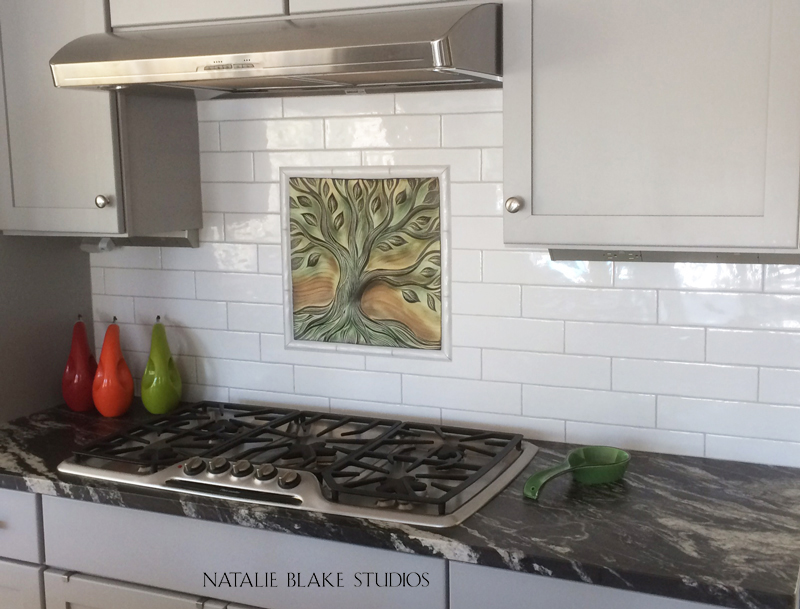
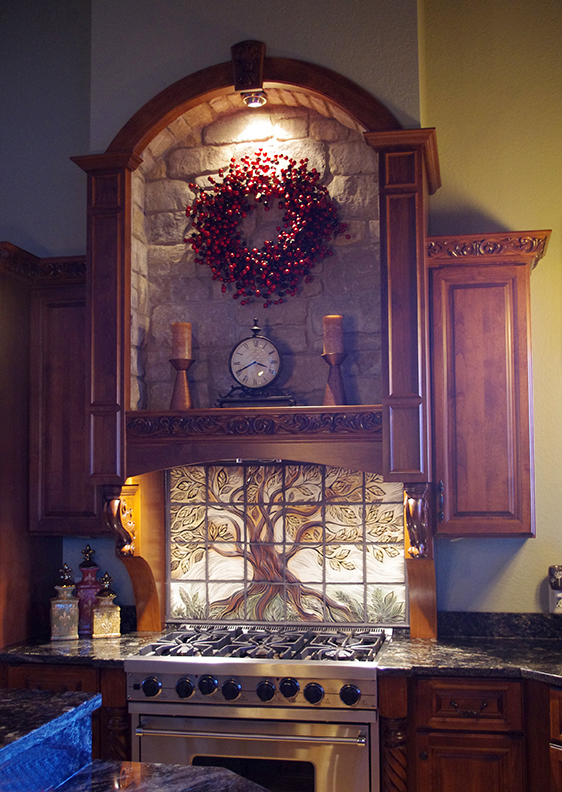
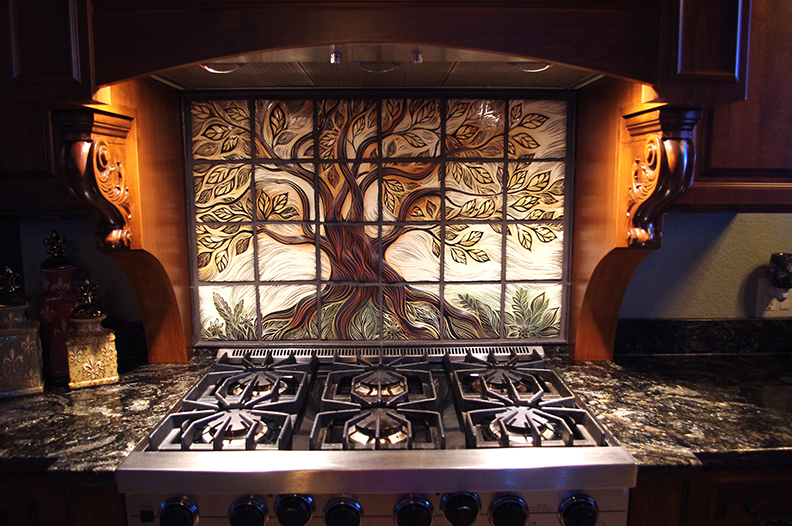
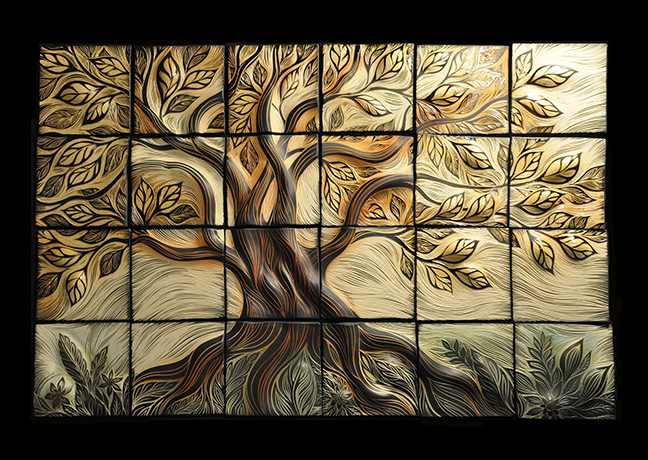
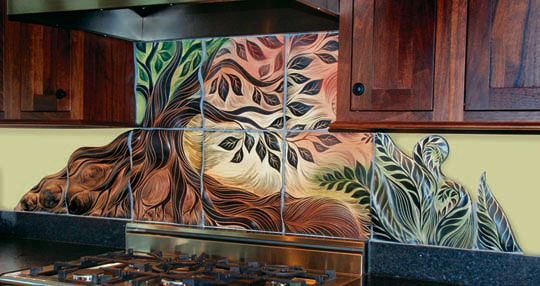
"Tree of Life" Porcelain Tile ~ Creates a Focal Point for a Residential Kitchen Backsplash
Natalie-Blake-Studios-porcelain-tile-custom-made-with-Tree-of-Life-design-for-kitchen-backsplash-used-with-white-subway-tiles
Natalie Blake Studios handmade porcelain tiles are a perfect complement for use with field tiles in a backsplash installation. This porcelain art tile is framed with a bullnose tile that matches the white subway field tile. The sixteen-inch hand carved and glazed "Tree of Life" was commissioned by a residential homeowner in Maine. Our tiles are vitrified, and glass like, so easy to keep clean and virtually no maintenance.
The client sent photographs (see below) of their kitchen before any of the tile or appliances had been installed. The tile was going above the stovetop between the cabinets, as shown above. The homeowners wanted glaze colors that would work with their beautiful new counter tops and cabinets. By sending the studio photographs of their kitchen in progress, we were able to work with them to find the right glazes to suit the new gray paint on the cupboards and the new counter tops. The clients chose the glaze colors to work with their new kitchen makeover.

1-Natalie-Blake-Studios-custom-16-inch-porcelain-tile-for-residential-kitchen-backsplash-in-Maine-used-with-white-subway-tiles_1618

2-Natalie-Blake-Studios-custom-16-inch-porcelain-tile-for-residential-kitchen-backsplash-in-Maine-used-with-white-subway-tiles_1619

3-Natalie-Blake-Studios-custom-16-inch-porcelain-tile-for-residential-kitchen-backsplash-in-Maine-used-with-white-subway-tiles_1633
They chose one our our "Tree of Life" designs. This unique tree was hand carved on the porcelain tile using the sgraffito method. Once a tile is carved, we always send a photograph to the home owners for approval, before continuing with the production of firing and glazing. Each of our tiles is a work of art, unique with its own characteristics, as they are hand-rolled, hand-formed, hand-carved and uniquely glazed.
"Approval granted. Looks great. Thanks for the quick work!"

4-Natalie-Blake-Studios-custom-16-inch-porcelain-tile-for-residential-kitchen-backsplash-in-Maine-used-with-white-subway-tiles_1616
Working with the client, the glazes were chosen - double cream and jade. Natalie Blake Studios recommends talking over the glaze colors, or requesting sample color chips to make sure your tile will match your environment. Their tile was then glazed as they had requested. A photograph of the glazed tile was sent for approval by the clients.
We wrote and told the clients that the glaze colors came out differently than we had expected. Such is the nature of this handmade ceramic medium. Glaze colors have many variables, including the kiln firing, the application and the hand mixing of the colors. We are often working with the energy of the kiln gods to have a good firing, and depend upon the kiln gods to create a piece of their liking! Natalie Blake Studios' policy is that you are happy with the final result. We always send photographs for approval. The studio offered to remake the tile and glaze it again, but they were pleased with the tile as it was.
Here is their response to the photograph of the tile was sent for approval:
"We love it. Actually looks more earthy. The green is perfect."

5-Natalie-Blake-Studios-custom-16-inch-porcelain-tile-for-residential-kitchen-backsplash-in-Maine-used-with-white-subway-tiles_1617
The tile was shipped to Maine for installation by their contractor.
"We received the tile today. It is perfect! This is the center piece of our kitchen and will be enjoyed and admired by a lot of people. Thank you for the great product and great service!"

6-Natalie-Blake-Studios-custom-16-inch-porcelain-tile-for-residential-kitchen-backsplash-in-Maine-used-with-white-subway-tiles _1739

7-Natalie-Blake-Studios-custom-16-inch-porcelain-tile-for-residential-kitchen-backsplash-in-Maine-used-with-white-subway-tiles _1740

8-Natalie-Blake-Studios-custom-16-inch-porcelain-tile-for-residential-kitchen-backsplash-in-Maine-used-with-white-subway-tiles _1741
Their kitchen has been finished. All the field tiles have been installed and grouted. The kitchen cabinets are finished and the appliances are in. Here are the photographs we just received from the homeowners of their completed kitchen remodel. The "Tree of Life" tile is in its new home!

Natalie-Blake-Studios-custom-16-inch-porcelain-tile-for-residential-kitchen-backsplash-in-Maine-used-with-white-subway-tiles

Natalie-Blake-Studios-porcelain-16-inch-handmade-hand-carved-Tree-of-Life-porcelain-tile-used-with-white-subway-tile-for-a-residential-kitchen-backsplash-in-Maine
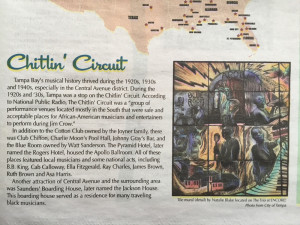
Perry Harvey, Sr. Park
A History Through the Art
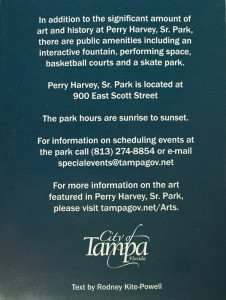
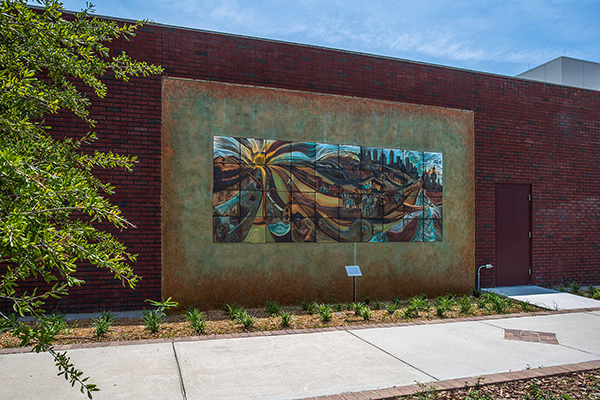
Perry Harvey, Sr. Park, Tampa, FL Located at 900 E. Scott Street, the park is a place where generations can come together to share the history of the Central Avenue, through art, music, and cultural attractions.

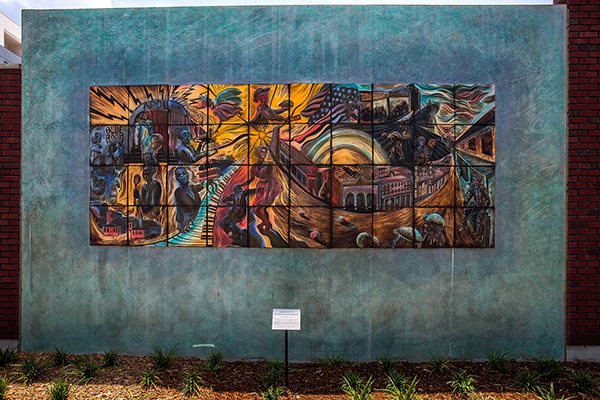
Clay Tile Murals by Natalie Blake Studios
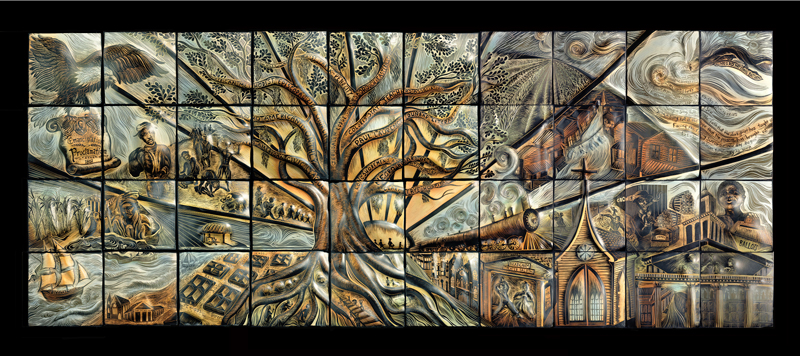
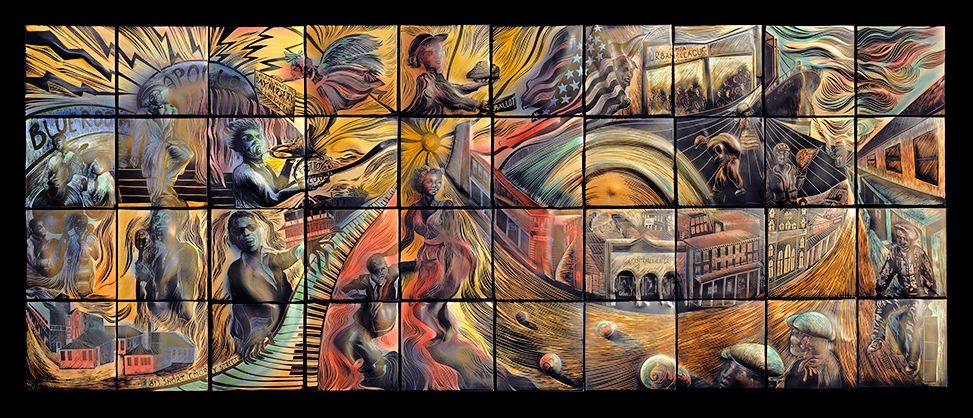
The Encore!® trio of murals, was made by Natalie Blake Studios This Public Art Installation was commissioned by the City of Tampa and Bank of America in 2014 as part of the Perry Harvey, Sr. Park.
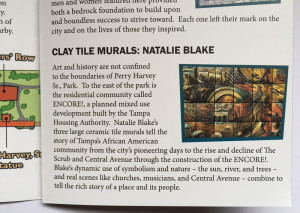
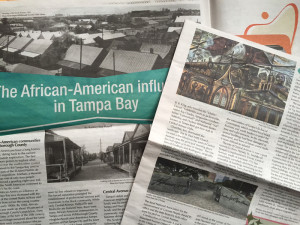
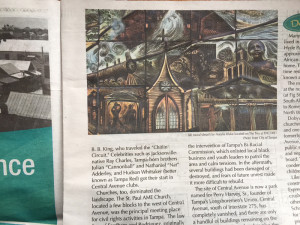
History of the Scrub and Central Avenue
 "The Scrub, once Tampa's oldest and largest African American neighborhood,
traces its history to just after the Civil War,
when newly freed slaves built homes in a scrub palmetto thicket outside of the Town of Tampa.
The heart of the Scrub was the Central Avenue Business District."
"The Scrub, once Tampa's oldest and largest African American neighborhood,
traces its history to just after the Civil War,
when newly freed slaves built homes in a scrub palmetto thicket outside of the Town of Tampa.
The heart of the Scrub was the Central Avenue Business District."
~ Visit ~

If you are in Tampa, Florida be sure to visit the park, and wander through the neighborhood! If you see the three Natalie Blake murals, send us your photos so we can add them to this post! Thank you!
Perry Harvey, Sr. Park 900 East Scott Street Tampa, Florida Information for Perry Harvey, Sr. Park: Phone: (813) 274-8854 Email: specialevents@tampagov.net

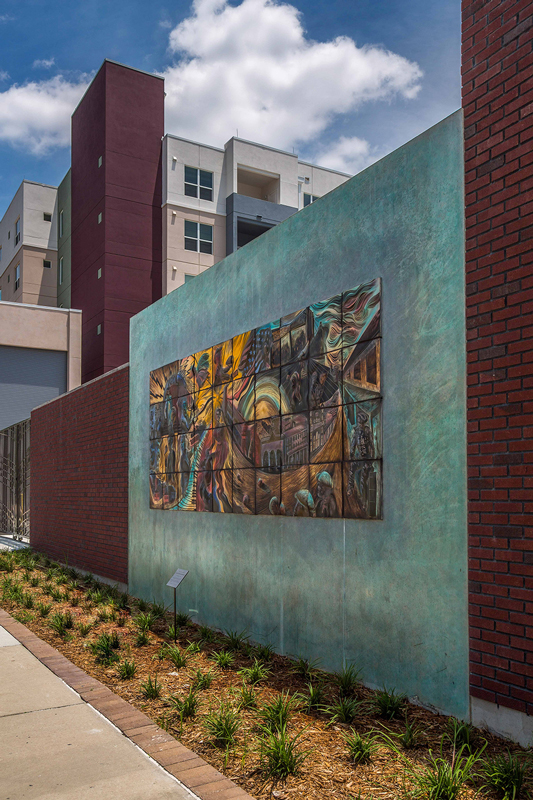
We did it!

Ceramic Tile Murals Tell the History of a Tampa Neighborhood
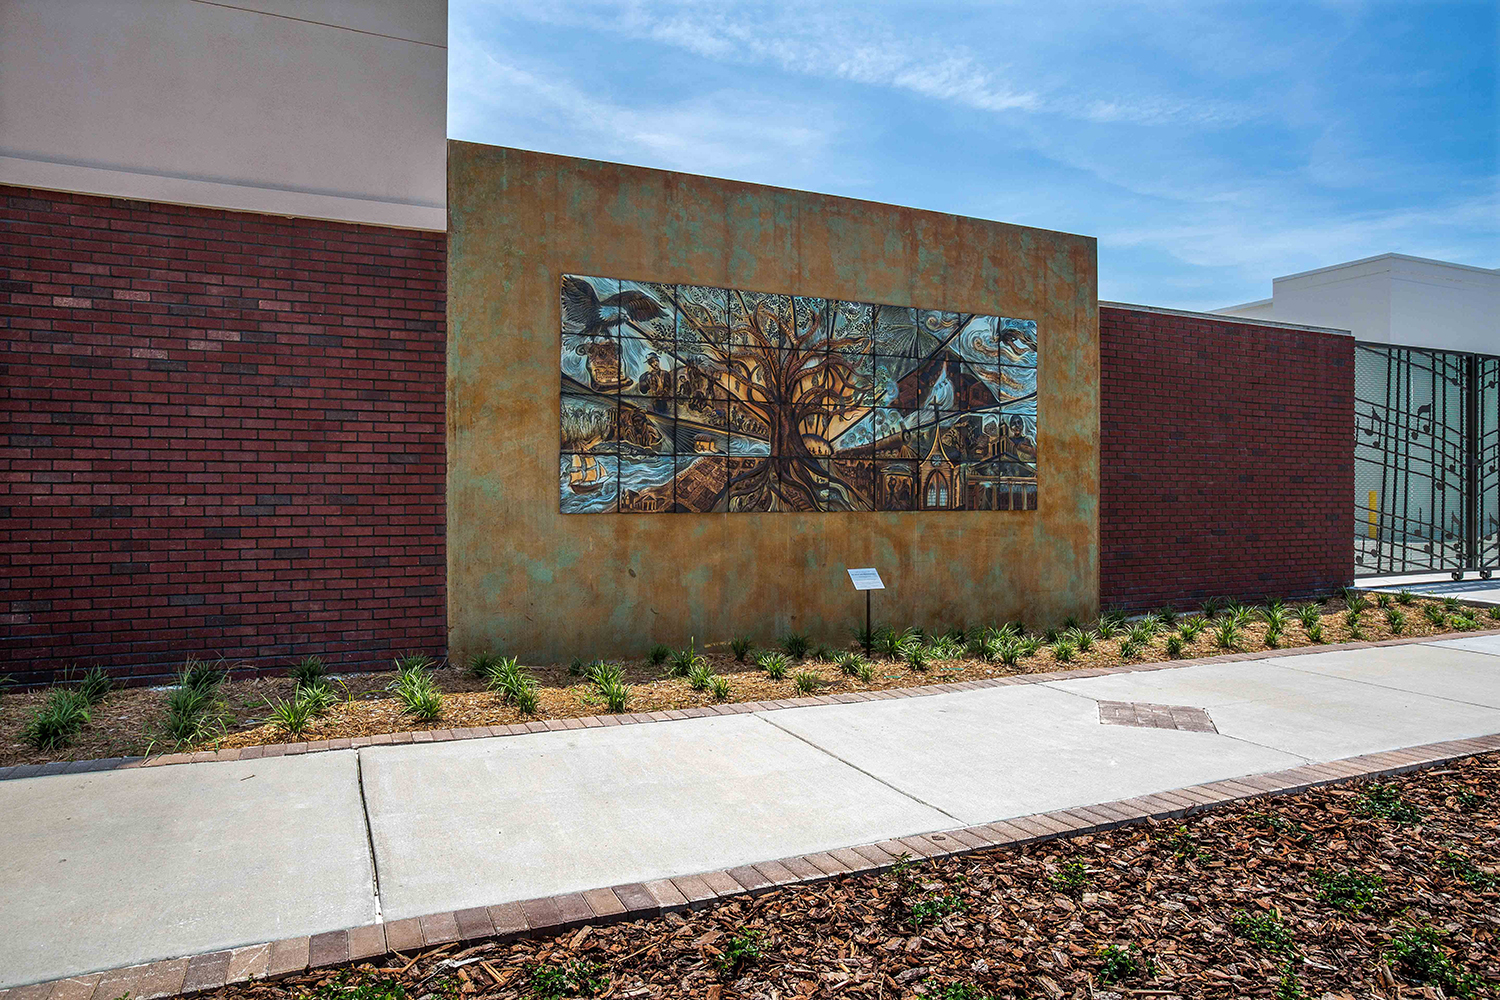
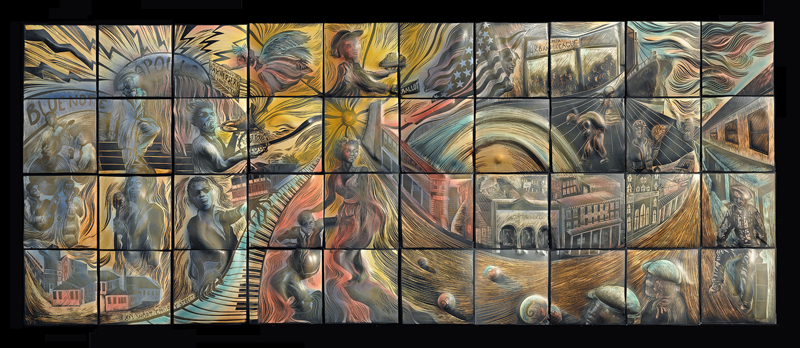
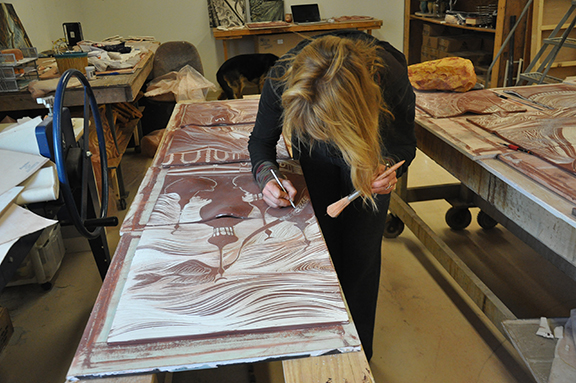
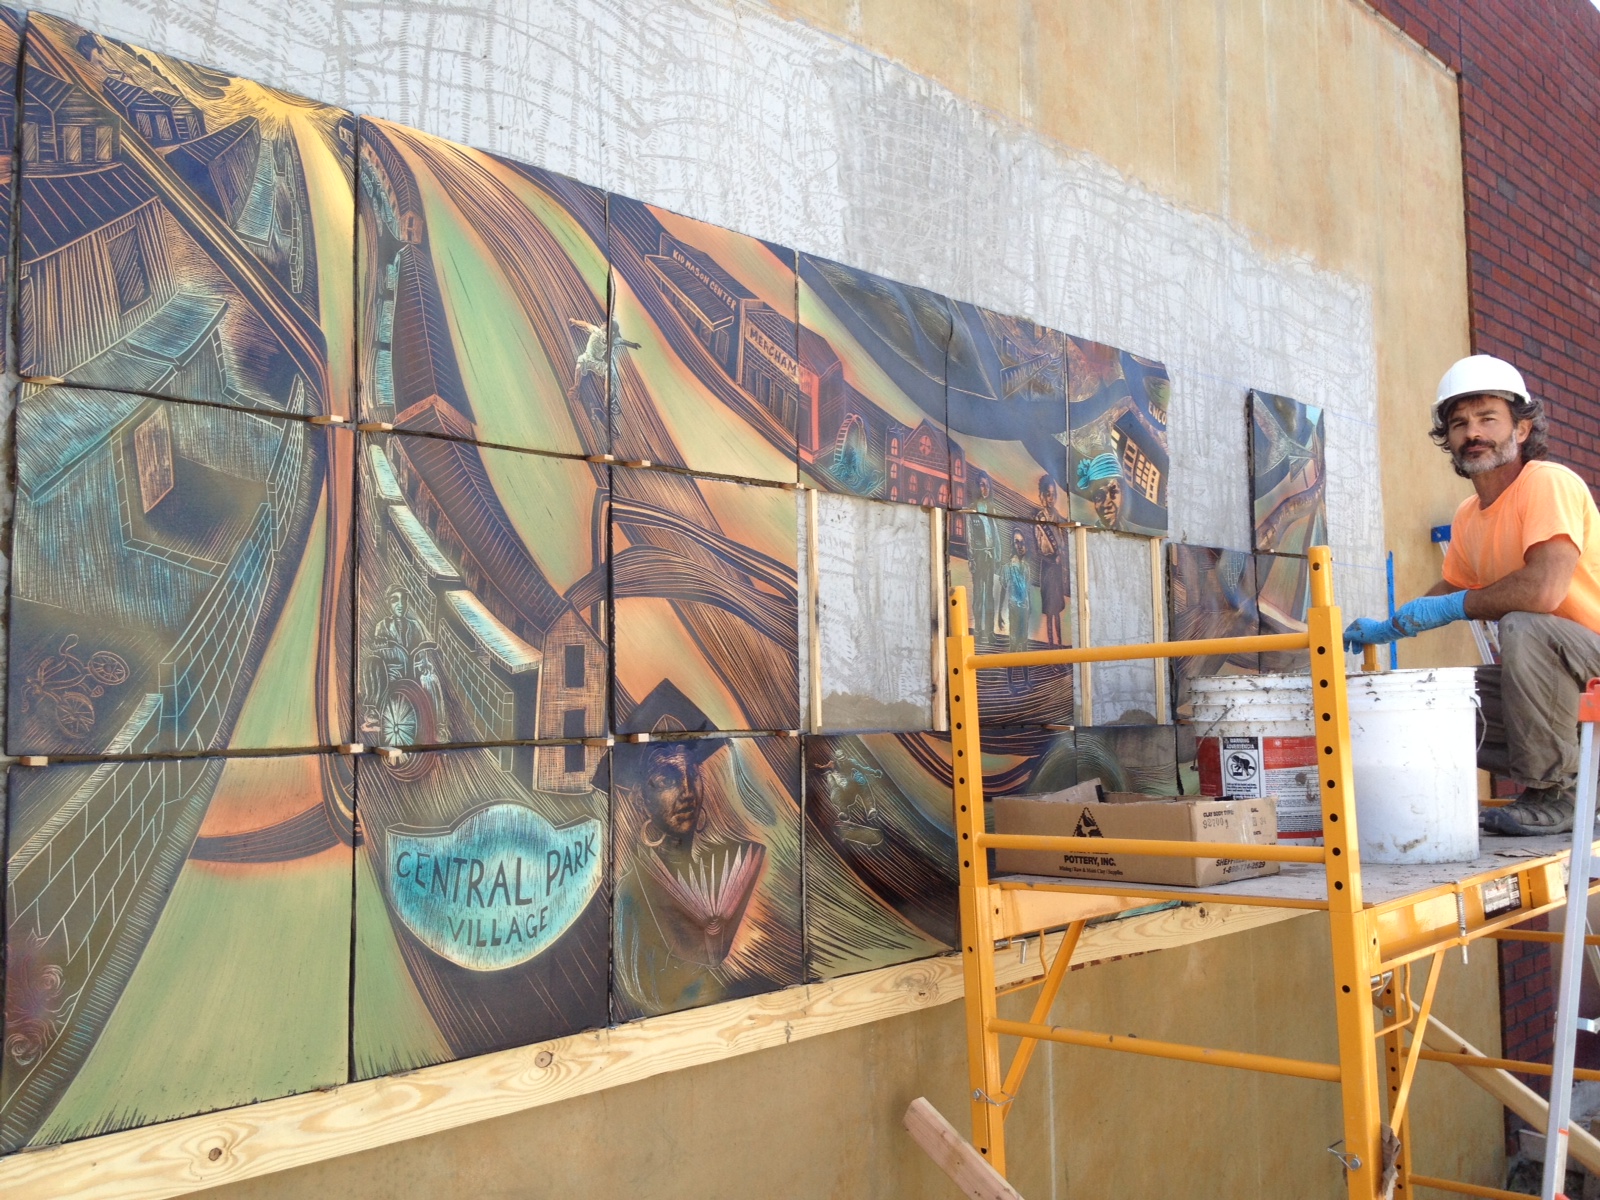
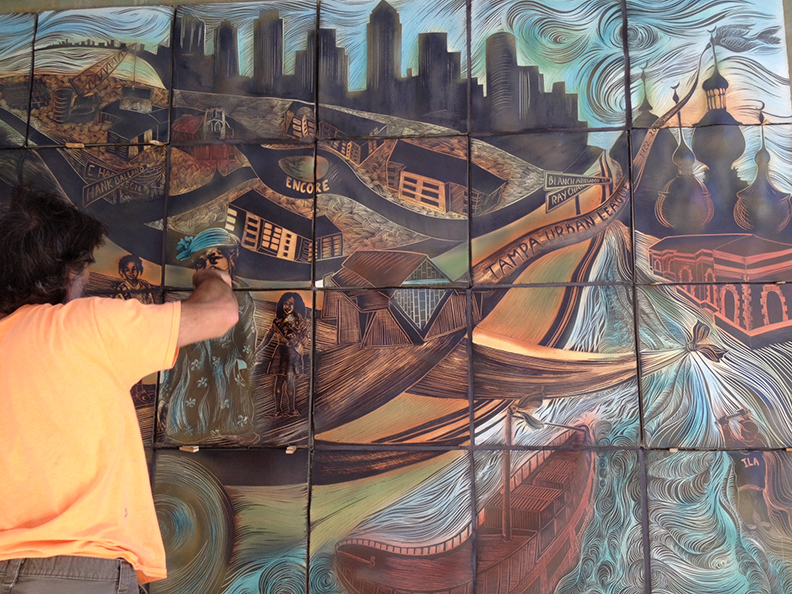
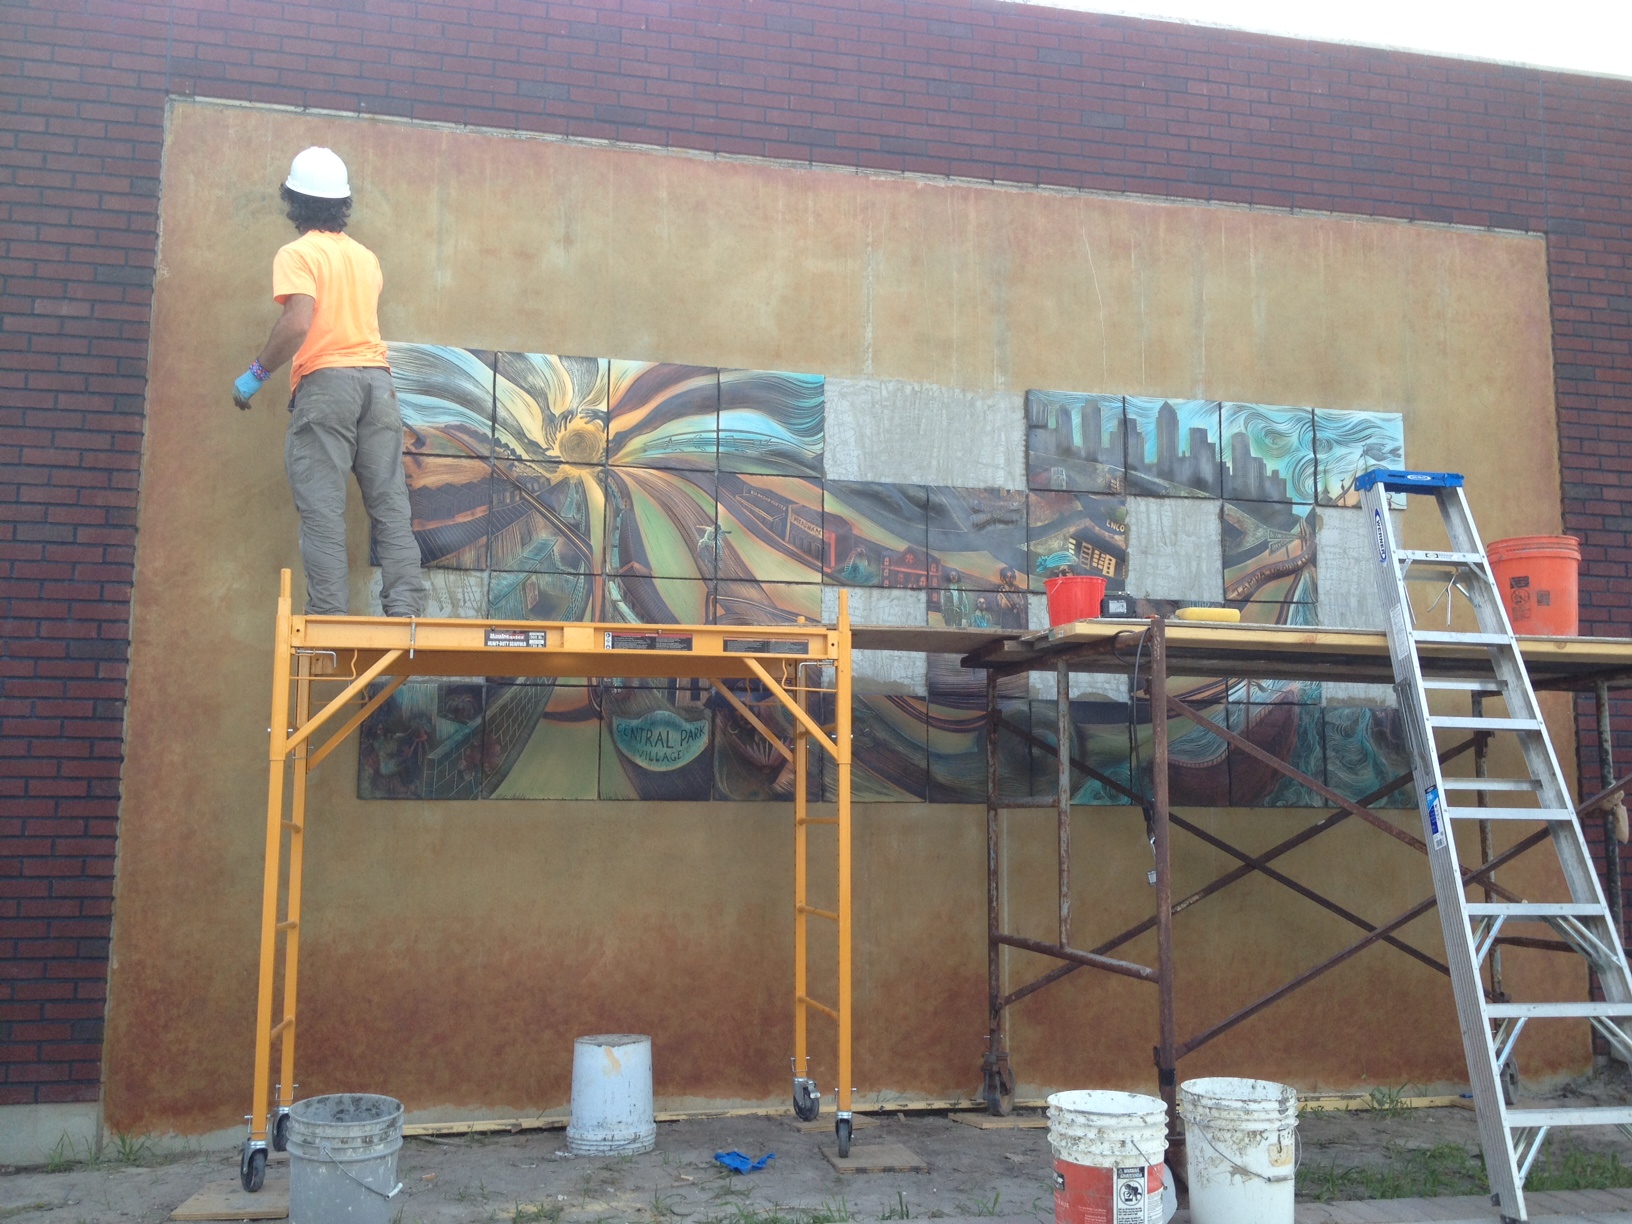
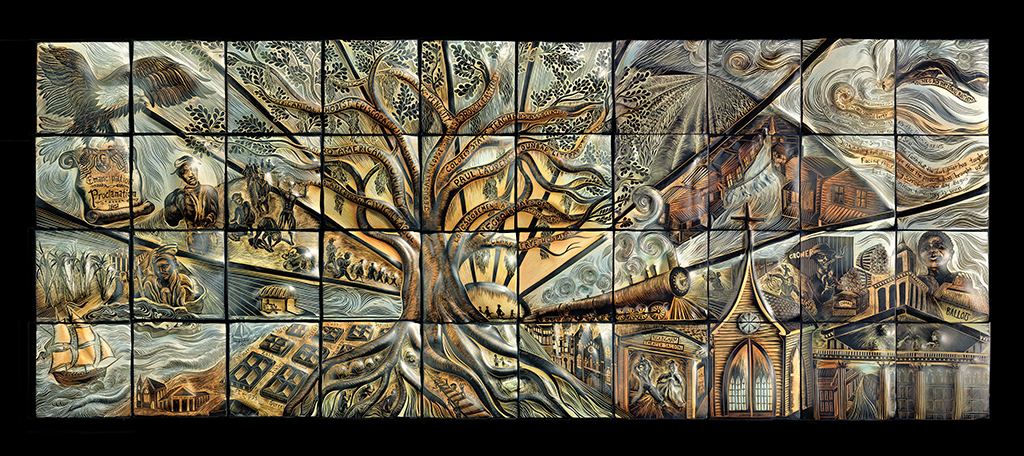
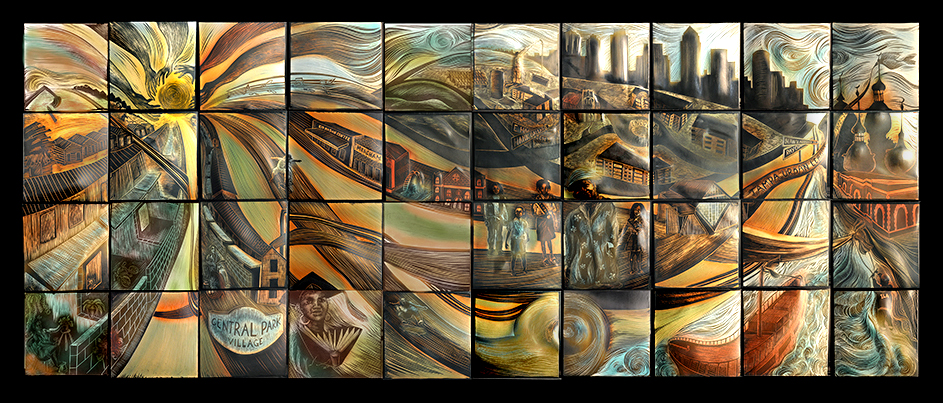
 Natalie's public art grant installation in Tampa, Florida is complete! Natalie and Nick rolled back into the studio last Thursday after spending 18 days on site mortaring and grouting 3, 6' x 15' ceramic tile murals onto concrete walls that run the perimeter of a new mixed-use development in Tampa. This installation was made possible through a generous public art grant awarded to the studio in 2013 by the City of Tampa, and Trio at Encore LP. Through this grant, Natalie researched the history of this largely African-American neighborhood and then traced its 200-year history in a series of three large murals. Through interviews and consultations with several historians and community members, Natalie compiled a rich history of this incredible community. She then translated these collected stories, using a blend of abstraction and realism onto three, 6’ x15’ murals comprised of 18” square ceramic tiles. The title of the piece, "The Gift of Gathered Remembrances," is inspired by Secrets of the Talking Jaguar by Martin Prechtel. In this book Prechtel recounts the story of a people who are deeply secure in their cultural identity because of their daily remembrance and reverence towards their ancestors. As Natalie says, "It is so awesome to make clay tiles. As I move into making public art, I appreciate more and more that my ceramic tile murals can be part of the story-telling. The tactile quality of my carved tiles means that the viewer can appreciate the work through several senses. I love the permanence of tile too. The mural not only relays the history, but becomes part of the history as well. It's an art form that we shouldn't lose." In a playful moment, Natalie carved a replica of the Encore development into the third mural. Then, on the wall that lines the development she carved a little sun, the recurring element in each mural. You'll find her signature in the lefthand corner of the second (middle) mural.
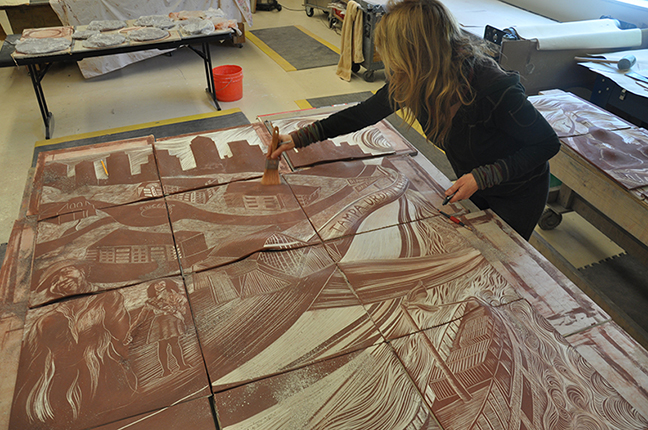
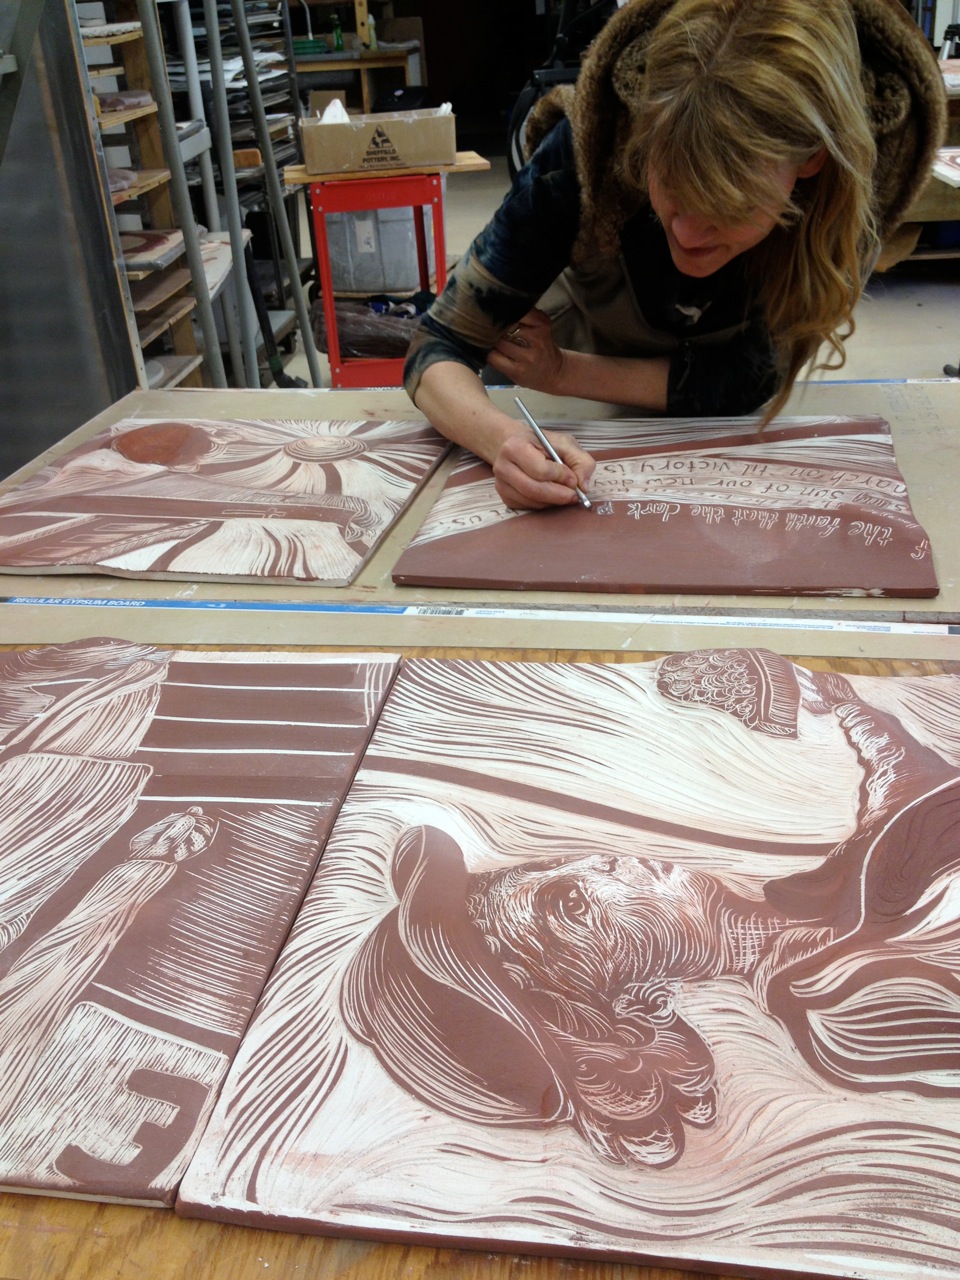 After months of carving, glazing and firing 120, 18" x 18" tiles, we were ready to begin the installation. Nick Marchese, Natalie Blake Studios' installer, and Alan, his assistant, drove the tiles to Tampa to begin the job. The installation got off to a rocky start as Nick and Alan were delayed by rain and thunderstorms for the first two days. But after a few fitful starts the project got rolling. They prepped the concrete walls by scoring them (slightly scraping the concrete surface so that the tiles would adhere better).
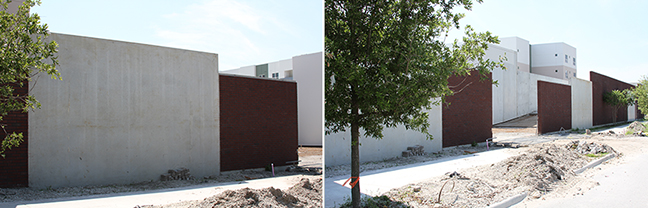
After a week Natalie flew down to relieve Alan. By that time many tiles had been mortared to the concrete walls and the mood on the site was much better! Nick used the ultimate thin set for porcelain and glass tiles. The mortar is so strong that it is used for tiling swimming pools. In fact, a crew of workmen who were installing a swimming pool on site, came by to watch Nick work and were impressed with his choice of mortar. After admiring the mortar (as tilers will!) they hung around to admire the murals too.
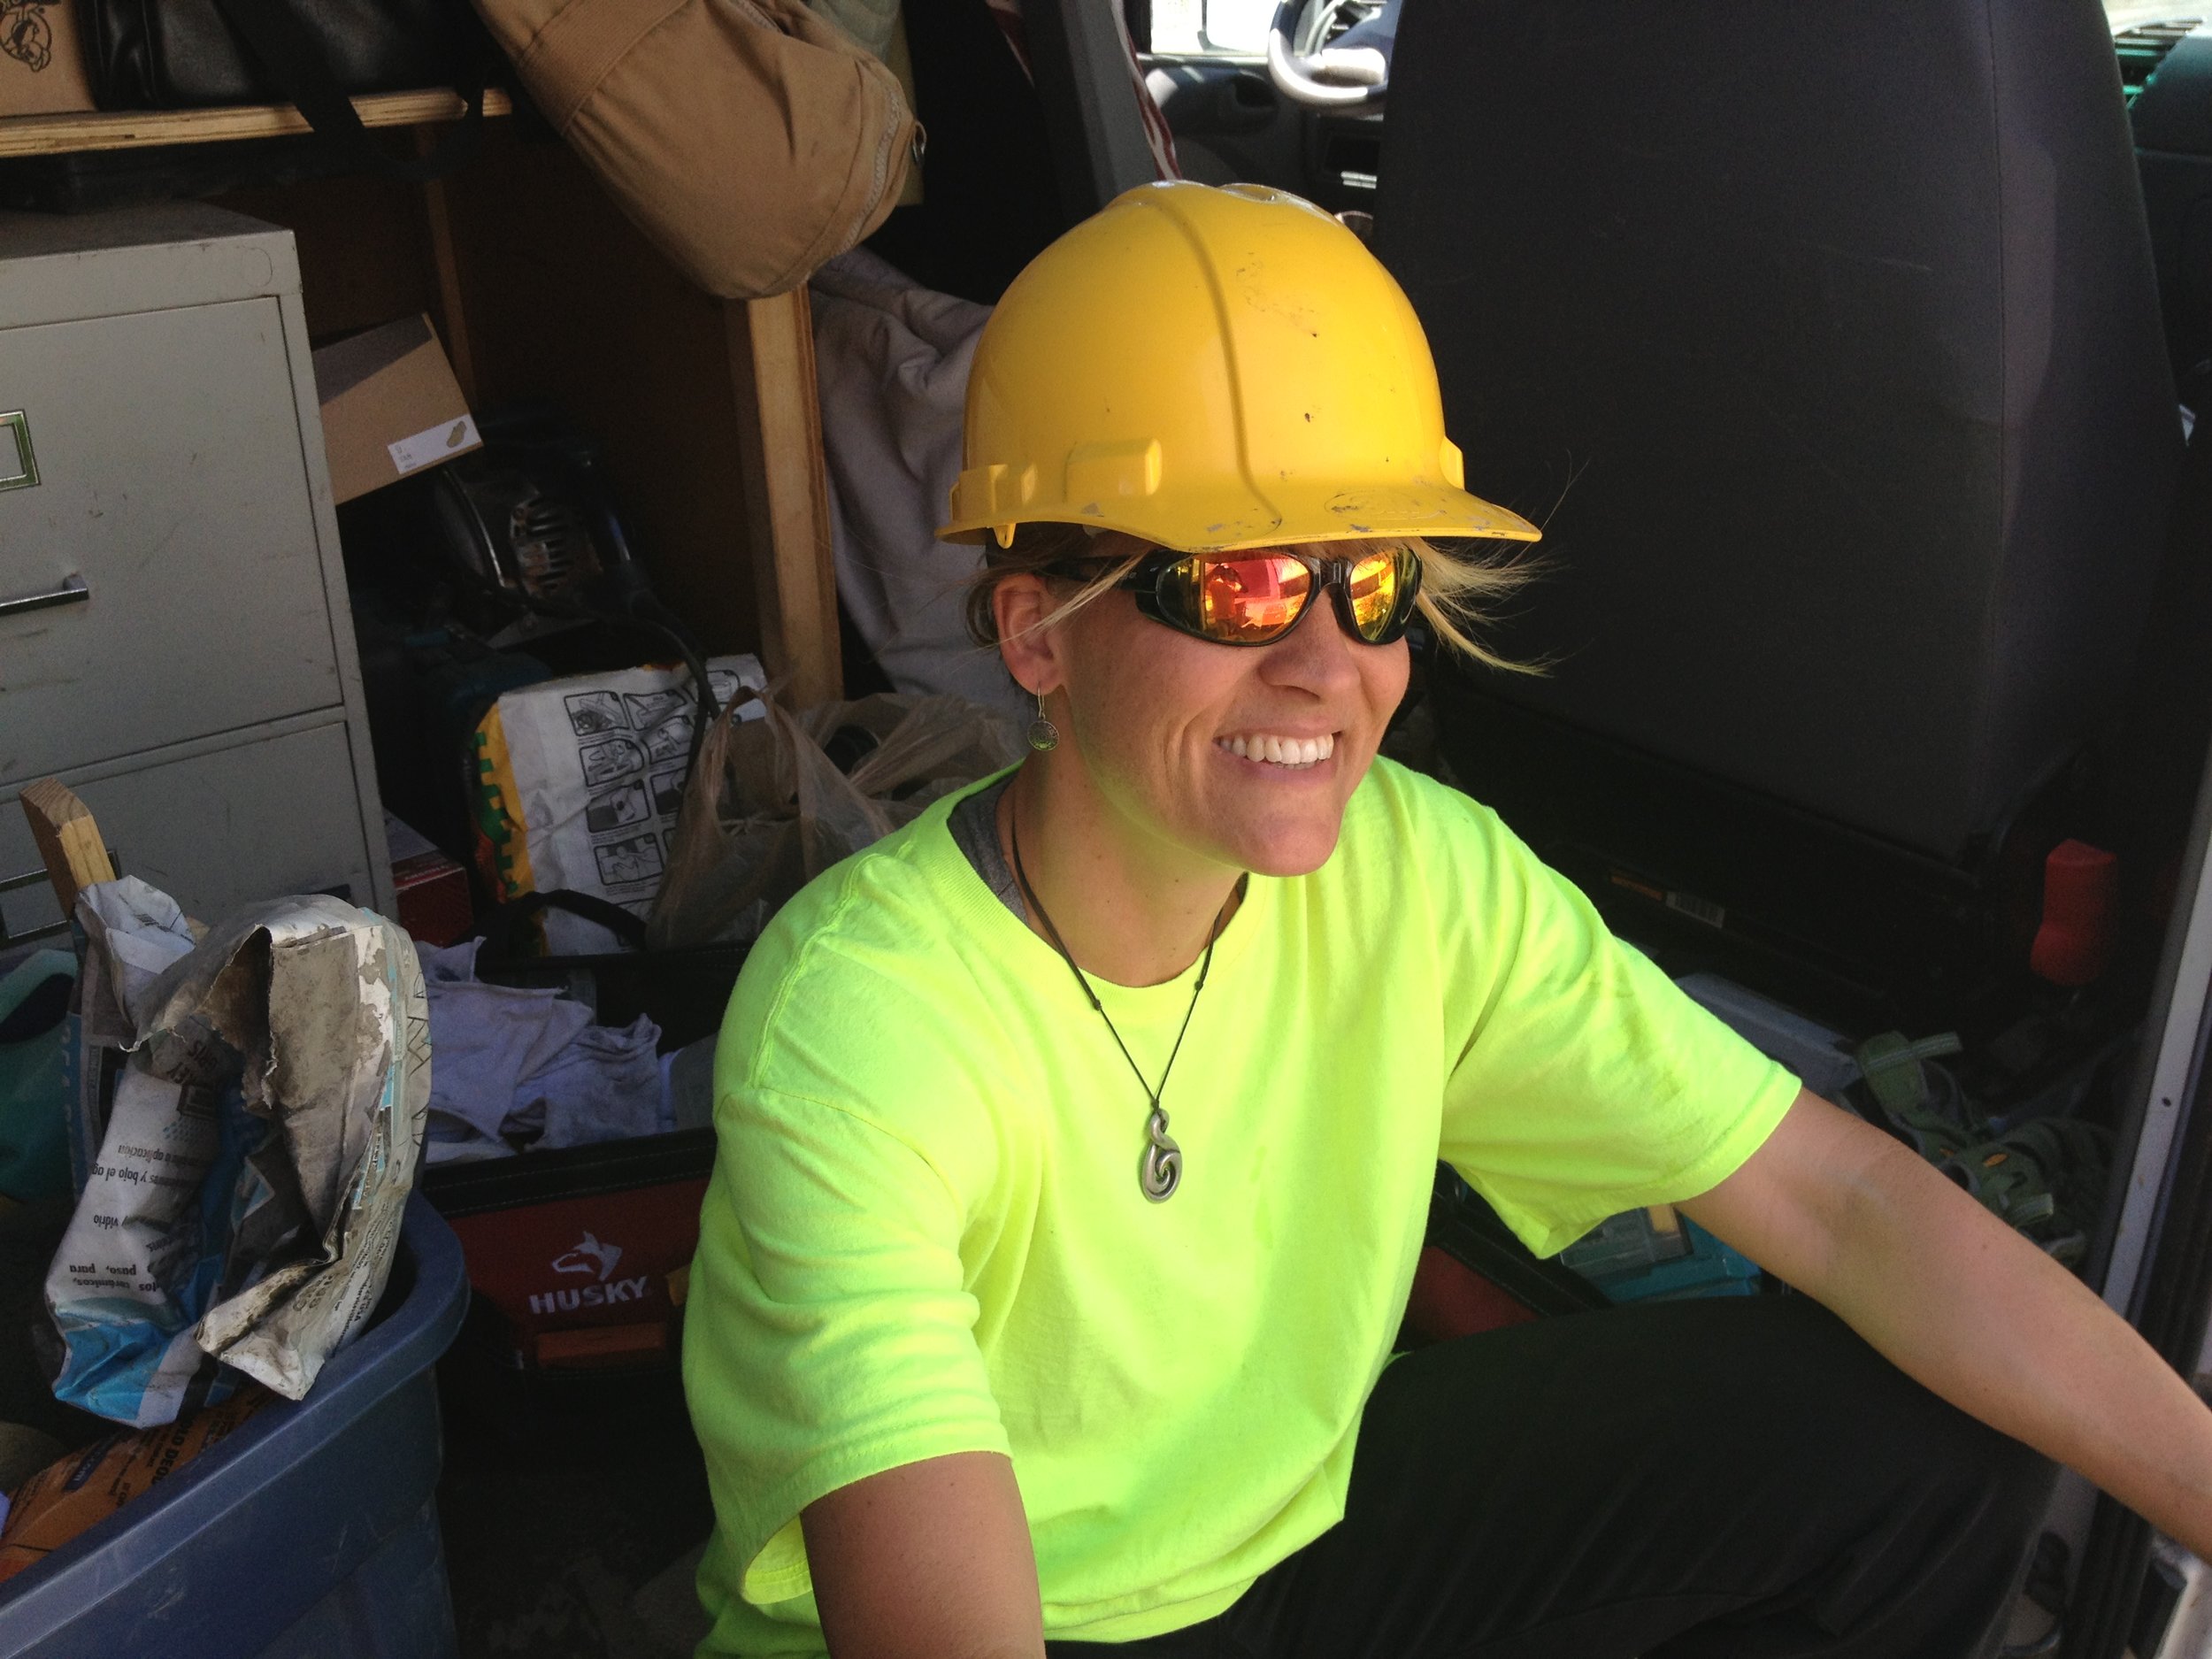
 The work site quickly became a hub of colorful activity. Natalie and Nick (and all other workers on the development site) had to wear bright, fluorescent shirts and hardhats for safety. The murals themselves were glazed in rich colors and the concrete walls around the murals were stained in lush orange, blue and purple.
Nick not only installed the tiles, but also created a beautiful "frame" of stained concrete around each mural. First he applied a deep orange acid stain to the entire concrete wall. Then he and Natalie went back and, with small sponges, dabbed on a soy-based stain in blues and purples. This "faux finish" look was then sealed with a soy-based product that created a beautiful sheen. He and Natalie were very happy with the results.

There were other visitors to the work site: Three older Black women who lived in one of the apartment buildings in the complex dropped by one day and told Natalie that they'd grown up in the neighborhood. So Natalie invited them to look at one of the murals. Natalie heard them laughing as they peeked under the protective tarp at the tiles. They were traveling down "Memory Lane" as they saw Natalie's depictions of historical events from their lives. Then one of the women, her hand raised as if in a High Five, exclaimed to Natalie, "Memories!" For Natalie this was the most special moment of the installation. Natalie and Nick also received kudos from representatives of the Bank of America (a major funder) and the Tampa Housing Authority. "It's greater than my expectations," said David from the Tampa Housing Authority. Melissa LeBaron, Tampa's Public Arts Coordinator, also dropped by and was so relieved to see that the last box of tiles had arrived safely from Vermont. (the backstory is that some of the tiles had cracked during the firing process--due to a bad batch of clay--and the studio staff were hard at work remaking those tiles in order to get them to Nick for the installation) Natalie and Nick really enjoyed their time in Tampa. For the most part the weather was beautiful, though quite hot! Because the sun beat full blast on their job site starting at about 1 pm everyday, they began work at 7.

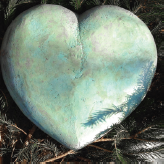
As Natalie says, "We were honored to be part of this amazing project to revitalize this important neighborhood. There's so much history here; the ancestors are watching and waiting to see how it will all turn out. We made our own offering to the ancestors; with the leftover mortar and grout Nick made his "heavy hearts" and we put them in special locations. Now, it is up to the residents to breathe new life into this neighborhood. We trust they will."
Watch this video clip of the unveiling of the murals: 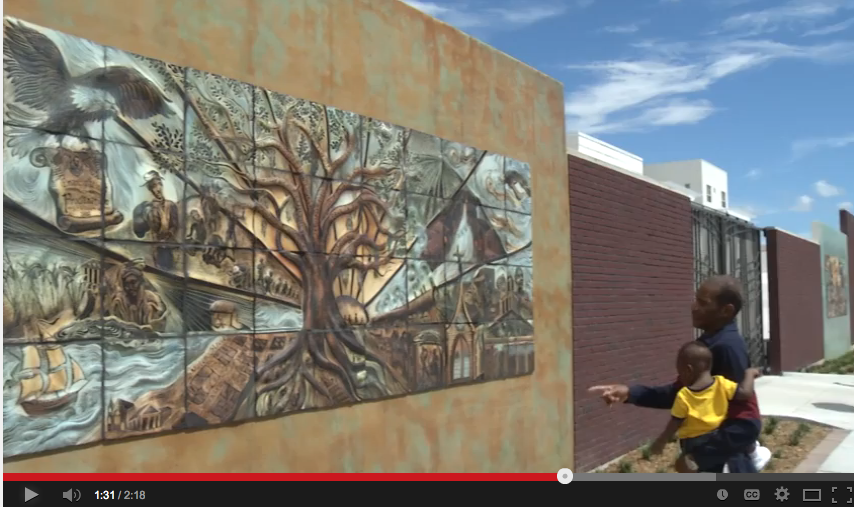 The Gift of Gathered Remembrances, I, II, III
What size should my artwork be?

Unless you work with an interior designer, it may be difficult to know what size wall art will look best in your space. When it comes to finding the right size wall art, there are a few tips to keep in mind so that you don't overwhelm (or underwhelm) your space with your art:
In general you should work around furniture, using the general rule of covering 1/2 to 3/4 of that area with your artwork.
One guideline is that the artwork should take up 4/7 of the selected space. Here's a math trick to help you figure that the size of the art you need:
Measure the width (or height) of your wall space, in inches. Multiply that number by .57
So, for example, if your area is 36 inches wide, you want to look for art that's 20-21 inches wide.
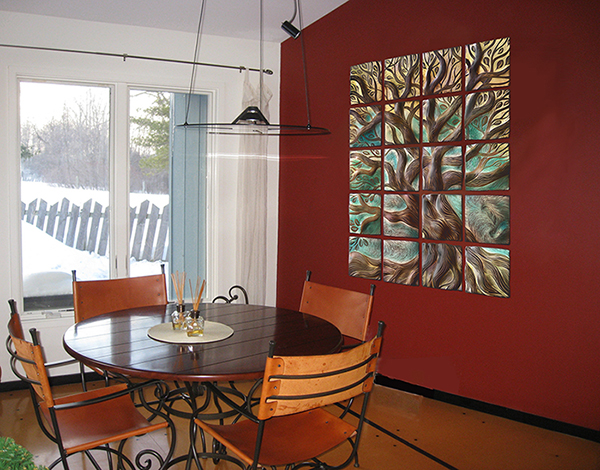
Here's an example of an appropriately-sized mural for this wall. The width of the wall is 96". Using the calculation outlined above, the artwork for this wall should be 54" wide. This ceramic tile mural, Live Oak, is comprised of 12" x 12" tiles, with 1/2" spacing between tiles. So the width of the piece is about 50". You can see that the mural fills the space nicely, with a nice "frame" of wall around the piece so that the room doesn't look cluttered by the artwork.
sculpted, carved ceramic wall art tile by Natalie Blake
In the example below the width of the wall is 144". Using the calculation, the mural should be about 82". The mural is 75" wide. Even without using the calculation we can see that the piece fits in the space. A large room such as this, with high ceilings, can take a larger piece of artwork. The benefit of a ceramic tile mural like this one is that the work can be appreciated from a distance, or up close to see the carving lines.

sculpted, carved, ceramic tile mural

ceramic wall art tile by Natalie Blake
Feel free to contact the studio if you'd like help determining what size ceramic mural would fit your wall. Our tiles are made in sizes from 12" -20" square. If you send us an image of your wall/space we can Photoshop a mural into the image to give you an idea of what the piece will look like.
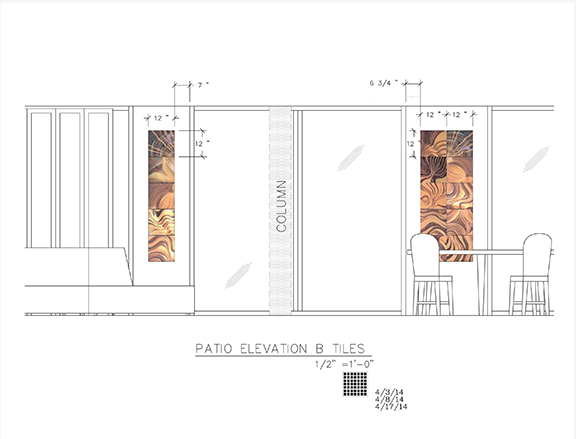
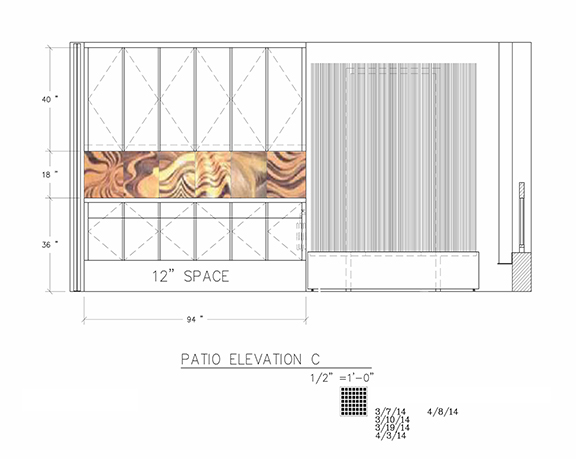
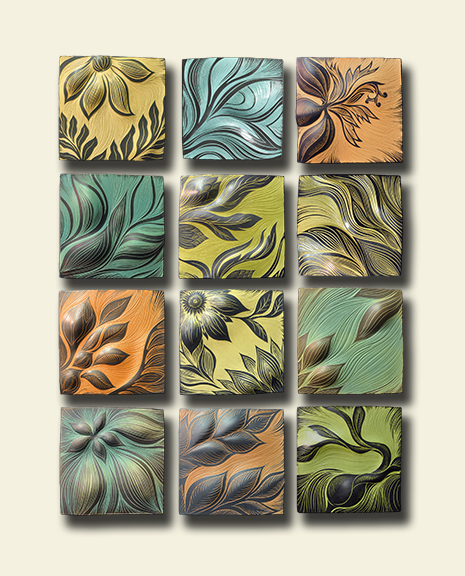
Architextural tiles
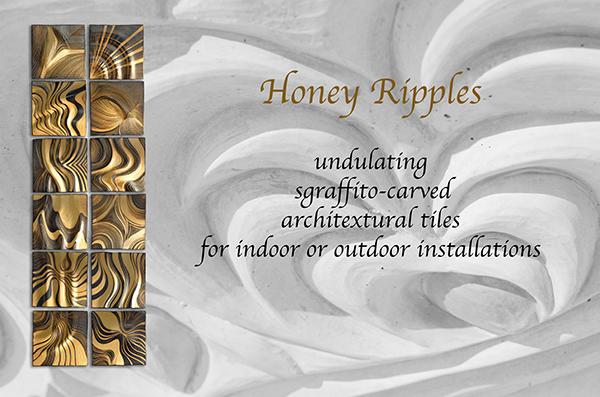 We developed this line of tile to showcase at the 2014 Architectural Digest Home Show. It was a big hit! Each tile is handmade, carved in our signature sgraffito style. The bold, gestural lines accentuate the sculptural undulations in the tile and almost read like topographical lines.
These tiles can be grouped in any configuration, customized in any of our sizes from 12" - 20" square, and glazed in any of our 33 rich, luminous glaze colors.
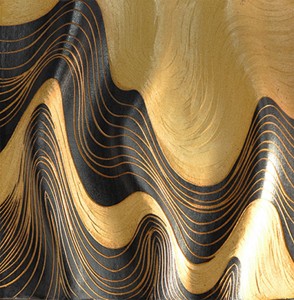
An interior designer in south Florida is commissioning these tiles for a residential, exterior installation. 15, 12" x 12" tiles will hang as panels and 6, 18" x 18" tiles will be grouted in as a backsplash in the outdoor kitchen.
Making a custom, kitchen backsplash
Our most recent backsplash…we call it Little Tree because we customized the tiles, making 7" x 7" tiles in order to fit the entire tree in the space.
handmade, ceramic backsplash tile
handmade, ceramic backsplash tile
A homeowner contacted us to order a custom-made, ceramic tile backsplash to go above her kitchen range. She gave us the dimensions of the wall space that she wanted to fill, minus the size of the "rod" style tile in black, wrought iron, that will border the custom tiles we make. We then determined that she'd need 7" x 7" tiles, allowing for the groutlines. When she said she wanted the Tree of Life design we Photoshopped an image of a Tree of Life mural on the image she sent us of her space. She loved it!

Photoshopped image of Tree of Life backsplash
She approved, and we've started the piece. We will work with her to pick glaze colors, first by sending her a sampling of 3" x 3" color chips so that she can see the actual glaze colors before making her choice.

handmade tile, Natalie Blake, ceramic tile, backsplash tile
We've started making the piece by first rolling out the tiles, and draping them over our forms on the table to give the tiles our signature undulation.
Click on the image below to watch a short video of this process:

backsplash tile, Natalie Blake
Here we are carving the piece:

backsplash tile, Natalie Blake

backsplash tile, handmade tile, Natalie Blake
Here's the final piece, fresh from the kiln.
handmade, ceramic backsplash tile by Natalie Blake
We just received (Dec 10, 2013) 2 images of the piece being installed. These images show the tiles in place, but not yet grouted. Stay tuned for more images!

handmade, ceramic backsplash tile by Natalie Blake

installed, not grouted 2
Fulcrum Arts Center: A Work in Progress
Work is well underway on the new Fulcrum Arts Center. This collaborative endeavor between Natalie Blake Studios and Solinglass will be a "not-to-be-missed" arts destination in Brattleboro, VT. The Fulcrum Arts Center will house a gallery and studio facilities that will provide numerous ways for prospective buyers to view finished works and work in progress; as well as to learn about the tools, techniques, and artistry of fine glass and handmade ceramic pieces. Interested collectors and buyers will be able to purchase finished one-of-a-kind pieces and functional wares and commission new work. We will offer design consultation for in-home art placement as well. Solin and Blake, both highly exclaimed artists in their fields, will teach master classes and workshops.
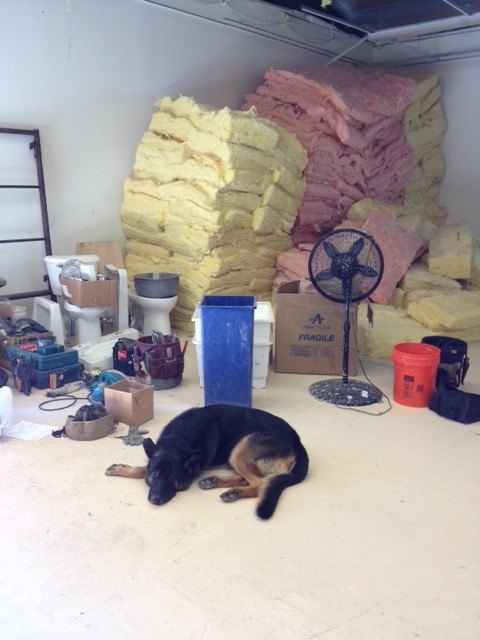
Work on the building began in July, when Nick, our master builder, pulled out 7,500 square feet of drop ceiling tiles and insulation! We want our new space to be energy efficient so some of this insulation will be used to insulate the Solinglass studio and to provide soundproofing.
Our new digs will be warm in the winter, thanks to a heat recapture system that Nick is designing. He's reconfiguring the existing forced hot air system to recapture Solinglass' furnace heat.
You can find regular updates on our work on Facebook.
Here are some updated photos of the work-in-progress:
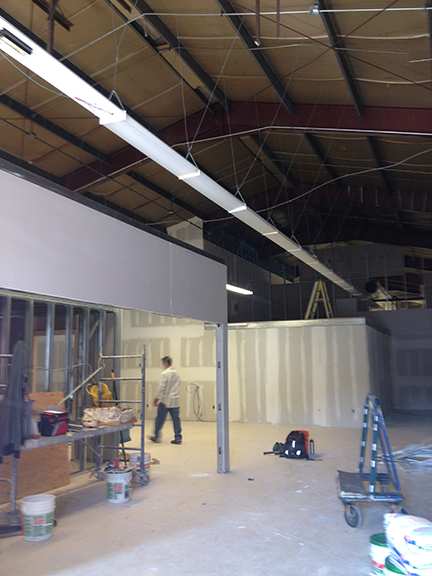

During the past few weeks Nick and his crew have been framing up the interior walls for the office, gallery, kitchen, bathrooms, studios and kiln room. Here's a short video showing the interior:
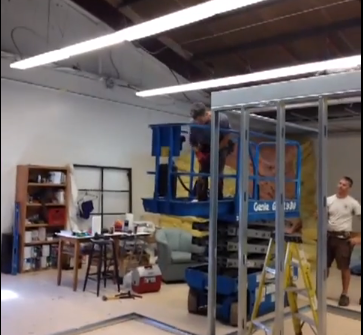
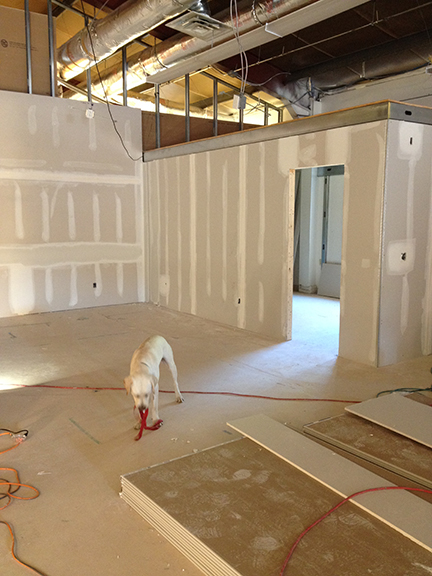
According to Nick, about 95% of the interior walls are now framed. Dry walling will begin in a few weeks.
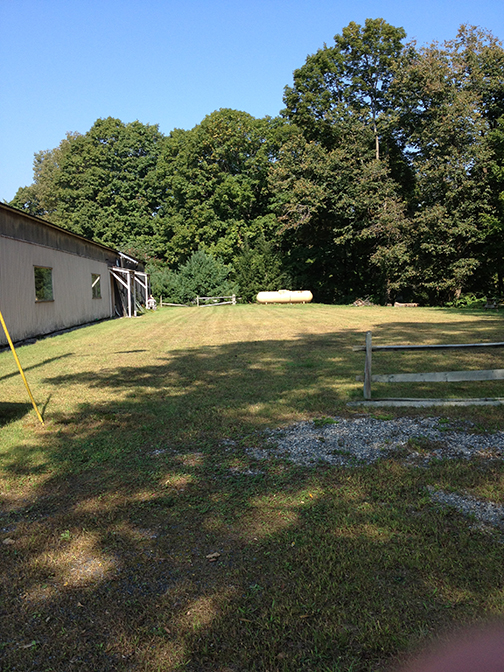
Our spacious backyard will be a great hangout spot for our crews and our dogs (there are 4 dogs between the 2 studios).
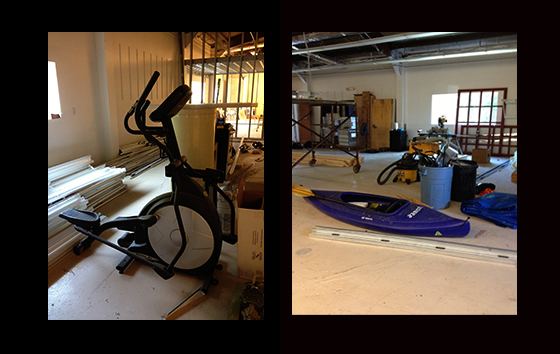
And, because we love to have fun and stay fit, we're planning to have a Stair Master in the building and a kayak out back since our property abuts the beautiful, highly-kayakable West River!
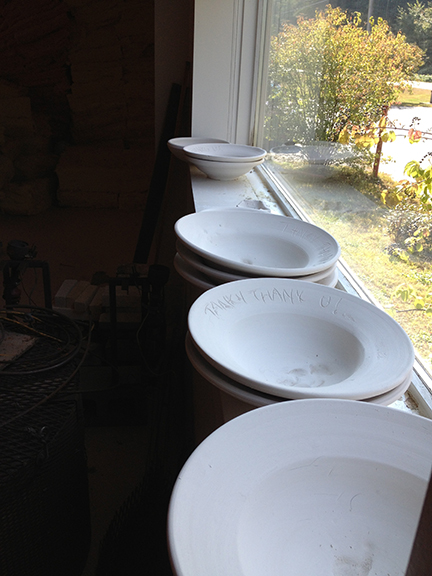
Natalie made her first work in the new building last Friday: handmade ceramic bowls. These ceramic pieces were made as thank you gifts for Natalie's friends and family to thank them for helping to find her missing dog, Tank, when he strayed from the Cotton Mill building last week.
We can't wait to move in and have you visit!
Grandmother Tree: From Inspiration to Installation


Custom Designed Tile Mural, Public Art
Our blog has closely followed the creation of several works of ceramic artwork that we installed at Chabot College after receiving their public art grant. Before any designs were drawn or tiles carved, Natalie and Cynthia traveled to the campus to find potential installation sites and gather inspiration from its spaces and its students.
Natalie and Cynthia also got to speak with students, who had influential requests:
“Give us beauty” and “a feeling that we are in nature.”“Remind us that we are HOME.”“Delight us with color to brighten our day.”“Don’t give us anything cliché.”
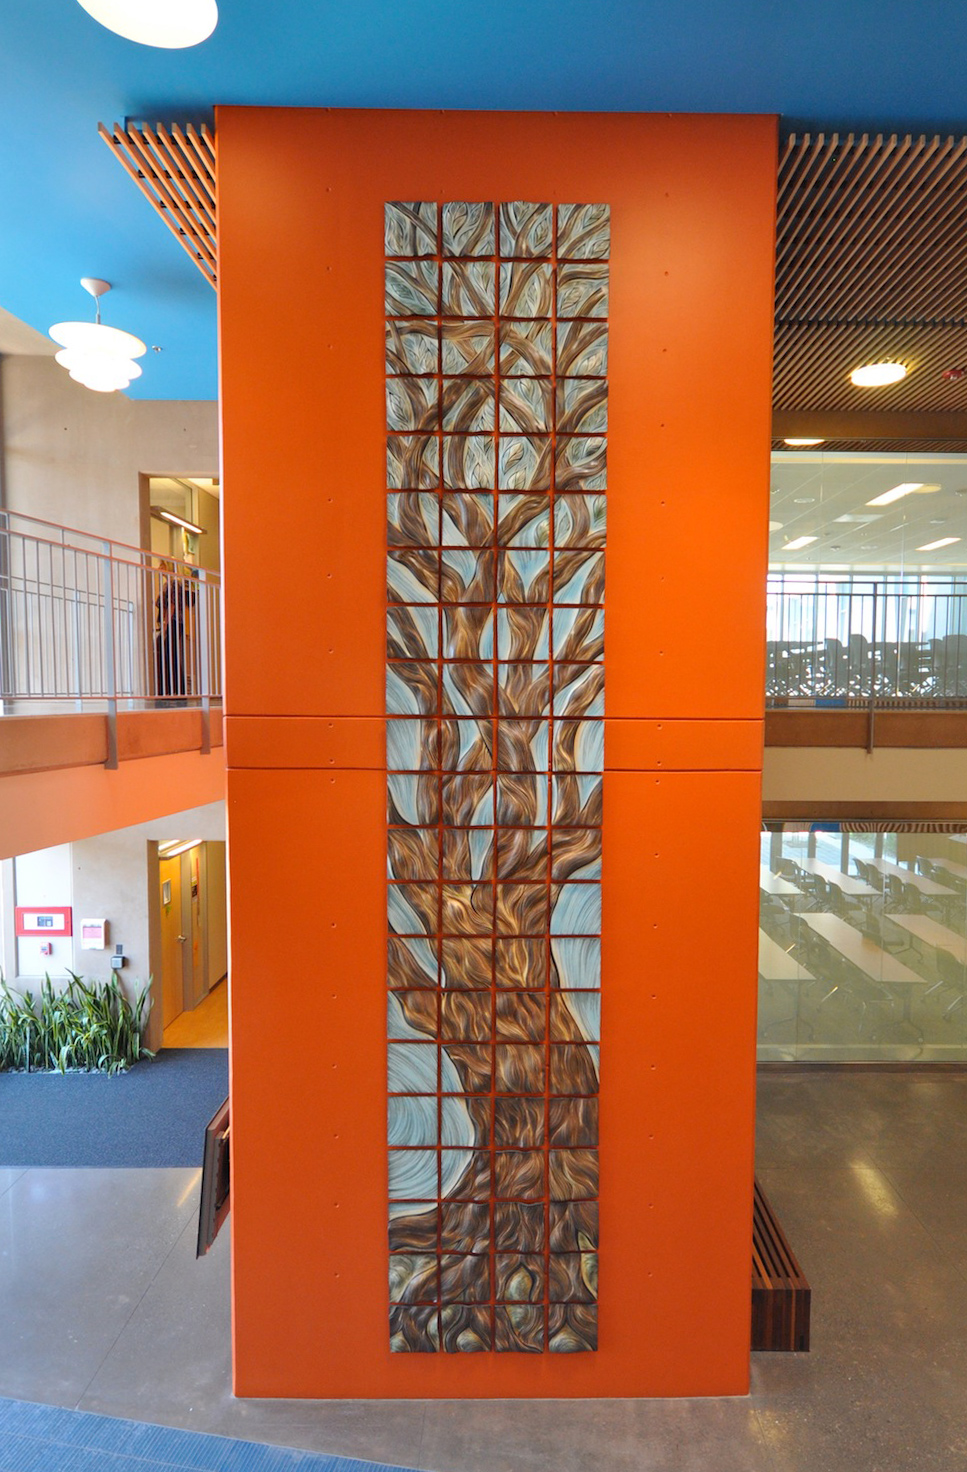
There were a lot of artistic possibilities at Chabot, but this location jumped out immediately – a towering orange wall in the midst of a wide open space in the newest building on campus, a faculty building. It begged for a custom designed tile mural of massive scale.
Like this perfect spot, it was hard to pass over images of the amazingly stoic and ancient redwood trees characteristic of northern California. A big, grand tree seemed the perfect symbol for this faculty space, representing knowledge and wisdom of generations and the ages in sculptural art.
Cynthia, our project designer, found a fitting design in an interesting way:
"When we were designing our proposal for this public art award we took one of our favorite trees and digitally stretched it onto this column. Shifting scale really changed the feeling of it; we loved the way it transformed the space and the column. The campus voted on their favorite ideas and then the arts committee gave us the go ahead. We were so psyched to take that digital concept and make it into a reality of ceramic artwork.
It was more than three times bigger than the trees we had been making so to accommodate it in our work space we sgraffito carved it in sections starting with the roots. Carving it was like a meditation on each aspect of the trees structure and the vital flow of energy which it embodies." - Cynthia Parker-Houghton
The finished sculptural art mural had 84 tiles, and at a total height of 252 inches, presented a totally new challenge of installation. So, we rented a mechanical lift, and the rest is history – or at least, a timelapse.

Timelapse: Ceramic Artwork Installation
See more images of our Grandmother Tree installation at Chabot College and all of our work on Pinterest.
Custom designed ceramic artwork, Public Art Installation
4 Ideas for Choosing Art for Outdoors

Ceramic Wall Art Tile, Outdoor Art
Summer is at its finest when the shady patio beckons, the pool looks heavenly and dinner is served right off the grill. Both the artists and the tiles of Natalie Blake Studios love being outside, and with outdoor living on the mind lately, we'll take this chance to talk about choosing tile wall art for outdoors.
Handmade tile is a great choice for outdoor decorative art. Inspired by colors and designs from the surroundings, tile art has an earthy quality that fits naturally outside. When choosing art for the outdoors, think about location, durability, installation, and most of all, color. To help get the creative juices flowing, here’s our guide to using tile outside and some ideas for outdoor ceramic wall art.
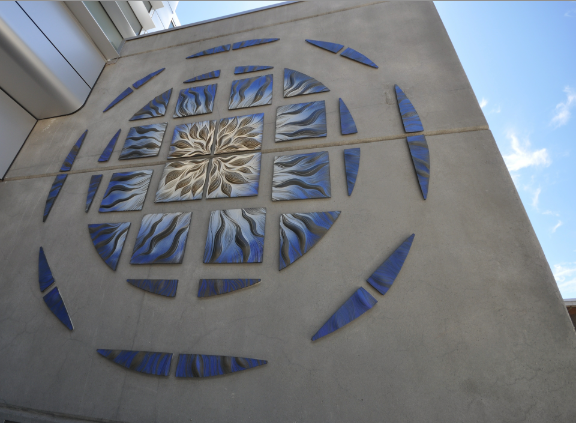
Where to Put Ceramic Art Outside Ceramic art can liven up a pool area, accent an outdoor kitchen or add color to a stone wall — a beautiful way to bring art to an outside space. These discs and butterfly shaped tiles would be stunning ceramic art for an outdoor fireplace or alcove, and a tile art mural could define an outdoor shower space. The options are limitless.

Sgraffito Carved Discs

Arctic Skipper Butterfly Tiles
Durability Ceramic tile, including wall art tile like ours, is very durable and will stand up to rain, sun and cold weather once it is sealed. Whether grouted directly on a wall, or hung with our outdoor cement board backing system, our ceramic tile is created to adorn any surface in any weather condition.
Installing Outdoor TileWall art tiles can be grouted in for a complete seal or they can be wall-mounted much like wall plaque. Once you've chosen where to place tiles, you can determine which method of installation is right for the space. Typically, we recommend using the grout method for high traffic areas where people could bump the tiles. Our patent-pending outdoor backer system is for places farther away from reach. We have some special tips for installing outdoor tile with grout, especially for tiles with undulating shapes like ours. Our installation methods have been field tested!

Outdoor Tile Wall Art, Installation
Colors Outdoor art can bring the color palette of the house into the outdoor living space, or can draw inspiration from the natural landscape around it. A few tiles of complementary colors can break up a large, one-colored wall. Or they can really make a statement, as do the vibrant colors and shapes of this large tile mural installed at a college.
Ceramic Wall Tile, Outdoor College Art
For more ideas on using handmade ceramic tiles as outdoor art, try browsing our handmade art tile for sale and in stock.
Tile Wall Art That "Pops" at Fireworks Restaurant
When Fireworks Restaurant in Brattleboro, Vermont, was putting on the finishing touches before opening four years ago, owner Matt Blau invited us to install some of our ceramic tile art in the restaurant. He said, "Do whatever you want. You tell me what you think would look good."
After those magic words, we brought some
that we had in stock to the Brattleboro restaurant and began looking at color and design. Our rich glazes worked really well against the wall colors and our designs seemed to fit naturally with the other design elements in the space. Almost on their own, these two ceramic tile murals found their home on the painted walls. The persimmon-colored abstracted tree, hung on the diagonal, added the perfect "fiery" entrance greeting to make the customer feel at home in the warm, vibrant surroundings and ready for good food. The mural is set for the perfect feng shui to provide a sense of invitation and arrival.
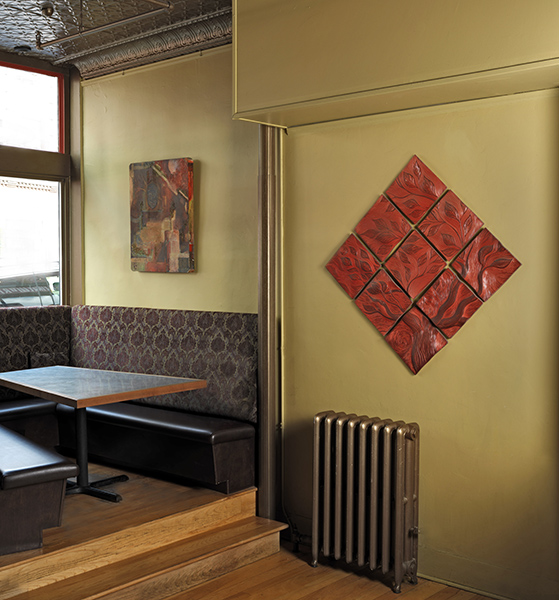
Wall Art in Fireworks Restaurant
The turquoise and burnt oak glazes on the long two-tier "window" of tiles absolutely popped over the rich dark purple black hues of Benjamin Moore's paint color "
". We decided on a simple and straightforward presentation of the tiles that sit over the side bar. They present almost like a transom window at slightly higher than eye level to add sophistication and elegance.

Vermont Tile Wall Art by Natalie Blake Studios

Vermont Tile Wall Art in Restaurant
On a recent visit to the restaurant Natalie received the following list of patron's quotes about the art tiles from the manager:
"Love the texture and color!"
"They are decorative, yet finely crafted."
"Love the botanical elements."
"Understated elegance."
"Love that the artist is local."
We love working with local businesses, and our wall art tiles are also installed in the second Fireworks Restaurant in Keene, NH. Not only are the businesses, and their owners, our friends, but we have the pleasure of seeing the art transform a space whenever we explore Brattleboro.
Placing our art in restaurants and doing an installation like this is so much fun for us. It's always a pleasure to find a blank slate, so to speak, to get creative, to work with the client, and to complement existing design elements from the space. It really gets our creative juices flowing!
Using Handmade Ceramic Tile with Field Tile
We see a "canvas" for Natalie Blake Studios tiles wherever a tiled surface, as in a kitchen, a bathroom, or a pool area, needs a pop of color or a handmade touch. Adding a mosaic tile mural to a tiled backsplash or wall is an artful way to get both the eye-catching appeal of handmade ceramic tile art and the functionality of traditional tile. When using handmade ceramic tile with field tile, choose tiles and colors that complement each other yet are different enough to make a statement. Glossy, solid- colored field tiles spotlight the richly detailed and colorful forms of Natalie Blake Studios' mosaic tiles, which in turn become an elegant centerpiece of the room.

Nautilus Shower Mural
Mosaic Tile as Shower Art Our handmade ceramic bath tiles are versatile and can be used in wet and outdoor environments, like showers and saunas, and are actually well suited for it (they’re ceramic tile, after all). This piece, Nautilus, is installed in a townhouse apartment bathroom in Washington, DC, where it adds depth and color to the clean, modern design of the bathroom.
For showers, kitchens, and anywhere that splashes are likely, it is essential to properly seal and install the tiles to protect them from dirt and damage.
Handmade Ceramic Tile in Kitchen Backsplashes Using our art tile as the highlight in a kitchen backsplash is one of our favorite ways to see our tiles installed. In the installation below, the playful shapes and colors of the Flowerscape, set off by the surrounding smooth field tile, break up the white of the kitchen.

Flowerscape, Handmade Ceramic Tile Backsplash
Our square tiles can also be incorporated into a tiled kitchen backsplash. Large murals or shorter horizontal groups add a vibrant splash of color to fit almost any size wall space (and many are in stock and ready to buy).

Adavasi Backsplash

Tree Branch, Backsplash, Handmade Ceramic Tiles
Handmade Tile in an Outdoor Landscape
Here's an example of handmade ceramic tile as decorative accents in a poolside, stone wall. The colorful tiles break up the monotone color of the stone wall and play off the beautiful, blue pool.

Handmade Tiles, Outdoor Pool Tiles
The possibilities are limitless. For more ideas on using handmade ceramic tiles in the kitchen, bathroom and even outdoors, get inspired by Natalie Blake Studios on Pinterest and Houzz. Keep an eye out forour new line of backsplash tiles, designed to fit as a mosaic or accent piece within a field tile backsplash (coming in the fall). Here's a sneak peek of our backsplash design tests:

Natalie Blake Studios Backsplash Tiles, coming soon
Q&A: Colors in Ceramic Sgraffito Art
Kitchen Tile Backsplash
Curious tile-lovers have a lot of questions about how we make our ceramic sgraffito art. So, we've collected some recent questions about color and glazes to answer here in our blog. This Q&A session focuses on color. Color – bright, vibrant, inviting color – is as much a part of Natalie Blake Studios’ distinctive ceramic art as sgraffito carving. While this isn't quite an article on how to glaze ceramics, we hope it will ease (or rather, pique) your curiosity about our most colorful ceramic sgraffito work. Here goes!
Q:How do you achieve the contrasting color where you have carved? I am sure you don't have that many different colors of clay.George H., via email
A: Great question, George, especially because it lets us start at the very beginning. To achieve that high contrast, we apply a coating of slip to unfired porcelain clay before beginning sgraffito carving. Our handmade tile designs are created by carving through the top slip covered layer. After the ceramic is bisque-fired, we apply colored glazes and fire again. The colors only show in the carved areas, and the dark slip that remains blends with the layer of glaze and shows through as black or some range of grey depending on what glaze it is blending with and how thickly the glaze is applied.

Handmade Ceramic Bowl
Q: How did you get that Melon color, it’s spectacular! Martha A., via Facebook
A: We have done a lot of testing to find glazes that are compatible with our claybody and which the slip blends well with. All this testing has resulted in a huge stock of more than 30 different colored glazes that we choose from to color our sgraffito ceramics. This bowl looks melon-y thanks to an exterior glazed in jade and a watermelon interior glaze.

Color, Glazing Handmade Ceramic Art
Q: How do you manage to get the shades of a single colour so evenly spread over a tile?Lata D., via Facebook
A: To apply our colored glazes, we use an industrial paint sprayer like the ones used to paint cars. It is essentially an airbrush, spraying a “mist” of glaze that our staff can control to change the intensity of the color. We spray one glaze at a time across the tiles, applying each glaze where we want that color on the mural, similar to painting. Spreading the color evenly and achieving smooth blending is an art that we are continually perfecting!
Got more questions about colors and glazes? Ask away in the comments or on Facebook, and tell us what you'd like to see on the next Q&A blog about our handmade ceramic art.
Natalie Blake Studios Ceramic Wall Art Wins Award
Our ceramic wall art is now officially award-winning! The news has us very excited, so pardon the exclamation points: we won a gallery award at Art Comes Alive! The annual fine art contest and exhibit took place this past weekend in Cincinnati, OH. We are honored that our tile art was voted into the exhibit, and even more so to receive a contract award from Gallery One, Naples, FL. This is the piece that got us there: "Botanical", a 42" x 56" ceramic wall art mural, glazed in honey, turquoise, cashew, moss and jade.
handmade, ceramic wall art tile
According to the Art Comes Alive sponsors, Art Design Consultants, Inc., the awards recognize the “brightest and best artists in a variety of categories.” Our piece is one of 150 chosen for the exhibit, out of a staggering 1,500 entries. Getting our tile art mural into the exhibit itself is no small feat, and requires an intense jurying process.
Roy Saper, owner of Saper Galleries and Custom Framing, was one of the jurors responsible for choosing pieces for the exhibit. “The online jurying process took me hours. And hours. And hours,” he said. And no wonder, with so many pieces of art in the mix. After each juror reviews each piece, the ones with the most votes are included in the exhibit. From that list, galleries and award donors choose the recipients of their awards.
That's where Gallery One comes in – they awarded us a gallery award, and will now carry our work at their gallery in Naples, FL. We will be honored to be represented by this great gallery, which also represents our good friend, fabulous Vermont artist and Fulcrum Arts Center business partner, Randi Solin of Solinglass. Funnily enough, we will share Gallery One with Dr. Seuss as well.

Mural hangs in Hawaii

This piece, called Mauna Kea, is installed on a stone wall in a garden at a Hawaiian residence. Natalie met the clients at the Philadelphia Museum Show. They saw her work and commissioned a mural to decorate this wall, which blocked their view of the volcano, Mauna Kea (side note: it's the highest point on the island of Hawaii). They wanted a piece that would "show" them the volcano. Natalie embellished the design with flora from the island, including the wild ginger plant. Natalie's fiance, Nick, installed the piece. His meticulousness ensured that the tiles are straight and inline with each other--not an easy task on an irregularly-shaped, stone wall. Here's what the client says about the piece: "Your work just keeps on amazing us. We love our volcano, especially during the evening when the setting sun lights it. I also love the face that inadvertently showed up in the clouds to blow the wind. Absolutely genius."


